Monday, December 28, 2009

December Daring Baker's Challenge - Gingerbread House

gingerbread house 1


I was really excited when I saw what this month's Daring Baker's Challenge was because this is something I have been doing for the past four or five years now. The very first one I made was so much fun, and such a success that making a gingerbread house from scratch has become a holiday tradition of mine.

The December 2009 Daring Bakers’ challenge was brought to you by Anna of Very Small Anna and Y of Lemonpi. They chose to challenge Daring Bakers’ everywhere to bake and assemble a gingerbread house from scratch. They chose recipes from Good Housekeeping and from The Great Scandinavian Baking Book as the challenge recipes.

For most of us, this is a busy time of year. For me, however, it's busier than the average person. In the months of November and December there are 7 family birthdays including those of my mom, my sister, my niece, my daughter and also my own. Add to that this year the brilliant idea of moving over the Thanksgiving weekend and you've got yourself enough going on to cause a near total and complete melt down! Luckily, I survived, but to be honest, we're still living partially out of boxes and I continue to have clothing packed away in every suitcase I own. All in due time (I hope).

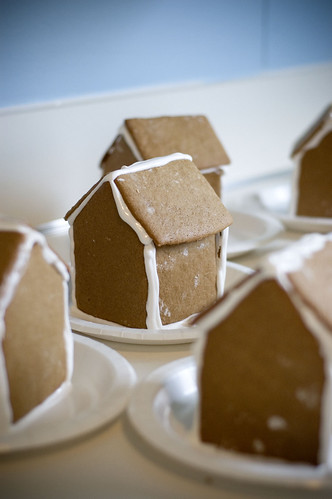
My daughter turned 7 on the 21st so the weekend before we had a birthday party for her with 7 of her friends. As the main activity I decided to make each girl her own little gingerbread house to decorate. Originally I was going to make our usual large gingerbread house that we decorate together as a family along with the smaller ones for the birthday party. Well, apparently I have a thing for biting off way more than I can chew because I ended up scrapping the large gingerbread house this year (to save my sanity - or what little bits of it I actually have left) and only made the smaller ones. I can laugh about it now, but let me tell you, I was frantically rolling out dough and cutting and baking tray after tray of little gingerbread pieces the night before the party, cursing myself for coming up with such an idea. "Oh, no problem! I'll just whip up some homemade gingerbread houses, yeah! So simple and easy! Why go the easy route and use graham crackers when I can make the gingerbread from scratch! GREAT IDEA!"**

**Note: NOT a great idea!

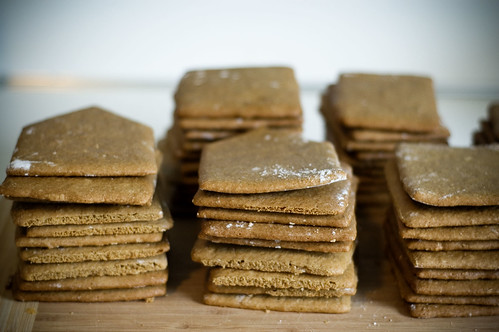
gingerbread house - pieces


Thankfully, I did manage to get it all done, and the whole party was a success. The girls were very excited about decorating their houses and it was the perfect activity for them. It was great to see their faces light up when they realized they would get to take home their gingerbread house and get to eat it too.

The Daring Bakers hosts chose two different gingerbread recipes which you can find here and here. I chose to go with the recipe I've been using for years now because it's familiar and it works really well for me.

gingerbread house 2


Gingerbread Dough

1 cup butter, at room temperature
1 3/4 cups brown sugar
1 1/4 cups granulated sugar
2 tablespoons molasses
6 eggs
6 cups all purpose flour
2 teaspoons baking soda
1 tablespoon ground ginger
1 tablespoon cinnamon
1 tablespoon allspice

1. Using a stand mixer, cream the butter and sugars until well blended. Beat in the molasses and the eggs one at a time.

2. In a separate large bowl, sift together the flour, baking soda and spices.

3. Slowly incorporate the flour/spice mixture into the creamed butter/sugar mixture until combined.

4. Cover and refrigerate the dough for at least 1 hour.

While the dough is chilling, make your house templates. Also, preheat your oven to 325° F.

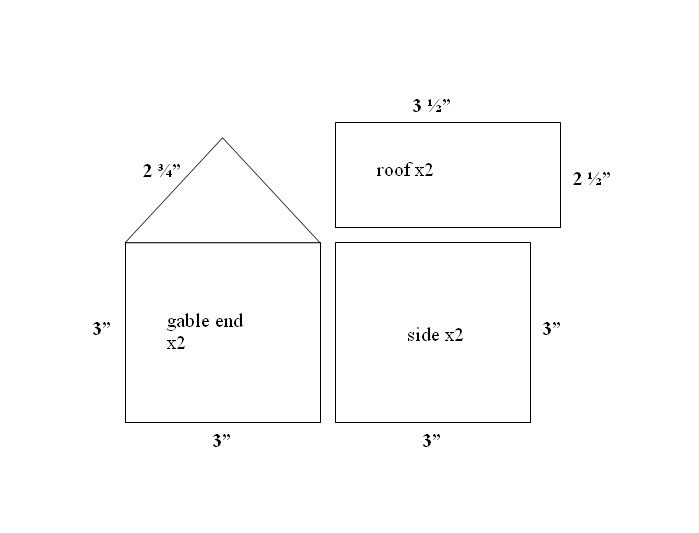
Here is what I used as my templates. I cut the pieces out of thick cardboard and cut each piece individually with a sharp knife.

gingerbread house - measurements


When your dough is thoroughly chilled, roll it out on a generously floured surface to approximately between 1/4 and 1/8th - inch thick. Once this dough gets to about 1/8 - inch thickness, it has a tendency to stick to the counter top (or rolling pin) really badly unless you're very careful about keeping everything well floured. Also, keep in mind that the dough will stretch a bit when you lift it to transfer to the baking sheet. If you're having problems with it being too sticky, refrigerate the dough for a while longer and re-roll it out thicker and that should help.

5. Lay your cardboard templates on the rolled out dough and working quickly to keep the dough cold, cut out your pieces and gently transfer to a silpat or parchment lined baking sheet.

6. Bake for approximately 18 minutes and transfer to a cooling rack. Let pieces dry overnight, uncovered.

To assemble, you will need royal icing. It dries fairly quickly and is almost as tough as concrete! But be forewarned, it doesn't taste good. In fact, it's horrible. It does, however, do the job it's supposed to quite well.


Royal Icing

3 egg whites
1 1/2 teaspoons cream of tartar
3 1/2 cups confectioners sugar

1. In a stand mixer, beat the egg whites until foamy. Add the cream of tartar. Beat until the egg whites are stiff but not dry.

2. Slowly incorporate all the confectioners sugar and beat until well combined.

3. Transfer icing to a pastry bag with a plain tip and you are ready to go.


Assembly

Start out with a gable end (that would be the one with the point in it) and a square side piece. Don't be shy with the royal icing. Yes, you can over do it, but generally as long as your icing is freshly made, you can't really use too much. Be sure to use a nice thick bead of icing on the bottom of each piece and if any of your pieces don't quite match up, just fill in any gaps with extra icing.

I like to let the four walls dry just a bit before I put the roof on, just to be sure things stay together. It really helps to have an extra set of hands, but if you're going totally solo, I've found that cans work really well at holding things up as they dry.

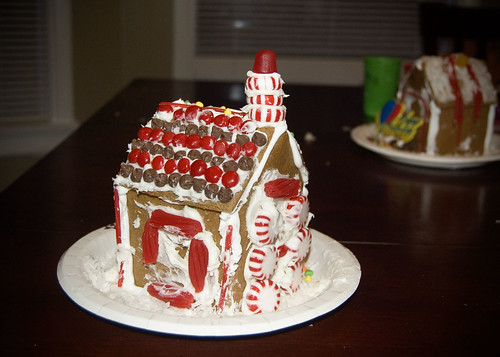
Once your house is fully constructed, let it dry for a couple of hours (or overnight) and you are ready to decorate! There is no limit to what you can use to decorate your house with. Things I've used in the past include: necco wafers (for roof tiles), Nilla wafers (also as roof tiles), dots, spice drops, candy canes, red hots, red licorice, coconut flakes, chocolate chips, M&M's, etc. etc. etc. I tend to just grab any and all red and green candies I can find.

All in all, this really is one of my favorite holiday projects and if you've never made your own, I highly encourage it!

gingerbread house - decorated

Monday, November 9, 2009

October Daring Bakers Challenge - Macarons

Daring Bakers October macarons - coffee painted macarons


Ah yes, the macaron. I love them so.

The 2009 October Daring Bakers’ challenge was brought to us by Ami S. of Baking Without Fear. She chose macarons from Claudia Fleming’s The Last Course: The Desserts of Gramercy Tavern as the challenge recipe.

It took a few trials and errors before I became comfortable making the oh-so-finicky macaron. I know which recipes work for me and most of the time end up with a final product that is every thing I set out for it to be.

Daring Bakers October macarons - mixing


Was I alarmed when I saw this month's Daring Bakers challenge involved a new, never before used (by moi) recipe for macarons? No. I felt fairly confident that I know what I'm doing and wouldn't have much of a problem with this new recipe. I thought, "Oh, hey, I'll just whip these up really quickly, no problem. I'm such a rock star macaron maker! I'll conquer this recipe too! Yeah!"

Cockiness is so unbecoming, isn't it?

Daring Bakers October macarons - folding


I'll be straight with you: I was TOTALLY wrong! I most certainly did not conquer this recipe. Nope. Not at all. This recipe gave me a good bitch slapping, a la Rick James to Charlie Murphy. Not only once, but TWICE! Yeah, didn't learn my lesson the first time apparently. I thought maybe the first time was a fluke, or perhaps it was just one of those macaron....things. You know, they don't work out sometimes. However, I like to think I've surpassed the days of not really knowing what I'm doing when it comes to making macarons. I can usually tell if something is not quite right before they're baked, and I tend to be correct.

Daring Bakers October macarons - piping
I love this part


Such was the case with this recipe. There seemed to be a lot of egg white to powdered sugar/almond flour ratio going on - 5 egg whites to roughly around the same weight of powdered sugar/almond flour that is used in recipes that tend to call for about 3 egg whites. Okay...I thought, how could more egg whites be a bad thing? Well, it was. I could tell the batter was different than usual after the macaronage stage. I persevered anyway and ended up with...well, not macarons. No feet. Undercooked. Sticky. Bleh. Not good.

Daring Bakers October macarons - prebake
I could tell something just wasn't quite right with this batter...


For some silly reason, I gave the recipe a second chance, despite being very pressed for time. What a waste that was! The second go-round was just as much of a failure as the first.

Daring Bakers October macarons - fail
whaaaaaat the effffff?!?!


Of course, having a bit of a perfectionistic nature, I had to bake them again...only this time using a tried and true recipe that doesn't fail me.

Success.

So in the end, I (finally) got what I set out to achieve and that pleases me. It pleases me greatly.

Rather than post the Daring Bakers recipe (which you can find here, if you're so inclined) I'm going to include the recipe that worked for me. If there's one thing I've learned about making macarons, it is this: not every recipe works for every one. Find what works for you and by all means, stick to it! Whatever tickles your fancy and gives you the results you set out to achieve is the best recipe to use.

Coffee Vanilla Bean Macarons
adapted from the always inspirational Helen of Tartelette

For the shells:
90 gr egg whites (about 3)
30 gr granulated vanilla sugar
200 gr powdered sugar
110 gr almonds
1 teaspoon espresso powder

method:
In a stand mixer, whip egg whites until foamy. Gradually add the granulated sugar and continue to beat until you have a glossy meringue with nice peaks (you can test if they're stiff enough by turning the bowl upside down - if the meringue stays put, you're good to go.)
Meanwhile, in a food processor, combine the powdered sugar, almonds and espresso powder and pulverize until the almonds are ground very fine.
Gently fold in the almond mixture into the meringue (I do this 1/3 at a time) being careful not to over mix. You want the batter to "flow like magma".
Place the batter into a pastry bag fitted with a plain tip and pipe onto silpat or parchment lined baking sheets. Allow the shells to dry for at least 30 minutes (I usually let them sit for an hour).
Bake at 280
° F for approximately 15-20 minutes.

To paint the shells:
Take approximately 1 teaspoon of instant espresso or coffee powder and add enough water to make a thick paint-like texture. Use a clean paint brush to add brush strokes to the top of the baked shell. Allow the tops of the shells to dry before filling.


Tuesday, October 6, 2009

Better late than never....September Daring Bakers Challenge - Vols-au-Vent

vols-au-vent


The September 2009 Daring Bakers' challenge was hosted by Steph of A Whisk and a Spoon. She chose the French treat, Vols-au-Vent based on the Puff Pastry recipe by Michel Richard from the cookbook Baking With Julia by Dorie Greenspan.

Yeah...so I'm massively late on this challenge, but in all fairness, I really wanted to try this one out and not skip the challenge despite being extremely busy last month (not to mention on the other side of the country for part of it as well!).

I have wanted to try making my own puff pastry so I was happy to give this challenge a go. In all honesty, it's not as difficult as it sounds or as one would think. It really just involves a lot of rolling and cooling. I'm really not a huge fan of rolling out dough - I think it's because I can never get a perfect square/rectangle/circle and that fact just kind of drives me a bit nuts. Hell, I can hardly get any shape other than 'uneven circular blob' most of the time! I think I manged to do pretty well this time around though.

vols-au-vent
dough ball, before butter is added

vols-au-vent
wrapping the butter

vols-au-vent
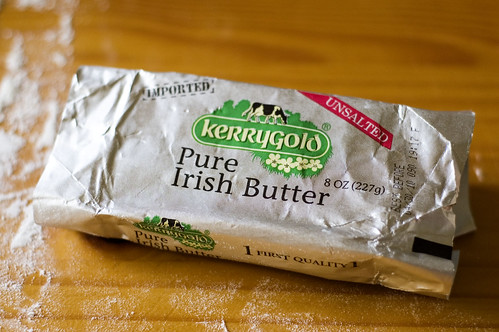
I used this Irish butter that has a better flavor than regular American butter

vols-au-vent
roll it baby! yes, I did use a tape measure because I am just that way

vols-au-vent
'turning' the dough as it's called

vols-au-vent
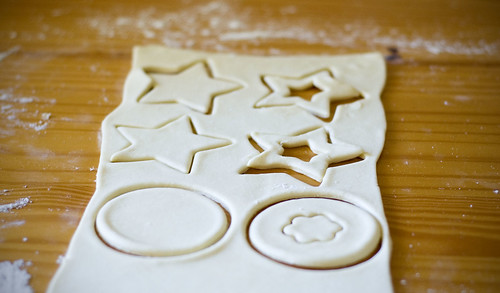
cuting the shapes for the vols-au-vent

vols-au-vent
ready to bake

vols-au-vent - figs n feta
the filling - figs, feta and honey


I really had to rush through this challenge, but it was a great experience and I'm glad I can now say I've made my own puff pastry. What's even better is I now have two sheets of homemade puff pastry stashed away in the freezer for future use.

Thank you Steph for a wonderful challenge!

Michel Richard’s Puff Pastry Dough

From: Baking with Julia by Dorie Greenspan
Yield: 2-1/2 pounds dough

Steph’s note: This recipe makes more than you will need for the quantity of vols-au-vent stated above. While I encourage you to make the full recipe of puff pastry, as extra dough freezes well, you can halve it successfully if you’d rather not have much leftover.

Ingredients:
2-1/2 cups (12.2 oz/ 354 g) unbleached all-purpose flour
1-1/4 cups (5.0 oz/ 142 g) cake flour
1 tbsp. salt (you can cut this by half for a less salty dough or for sweet preparations)
1-1/4 cups (10 fl oz/ 300 ml) ice water
1 pound (16 oz/ 454 g) very cold unsalted butter

plus extra flour for dusting work surface

Mixing the Dough:

Check the capacity of your food processor before you start. If it cannot hold the full quantity of ingredients, make the dough into two batches and combine them.

Put the all-purpose flour, cake flour, and salt in the work bowl of a food processor fitted with a metal blade and pulse a couple of times just to mix. Add the water all at once, pulsing until the dough forms a ball on the blade. The dough will be very moist and pliable and will hold together when squeezed between your fingers. (Actually, it will feel like Play-Doh.)

Remove the dough from the machine, form it into a ball, with a small sharp knife, slash the top in a tic-tac-toe pattern. Wrap the dough in a damp towel and refrigerate for about 5 minutes.

Meanwhile, place the butter between 2 sheets of plastic wrap and beat it with a rolling pin until it flattens into a square that's about 1" thick. Take care that the butter remains cool and firm: if it has softened or become oily, chill it before continuing.

Incorporating the Butter:

Unwrap the dough and place it on a work surface dusted with all-purpose flour (A cool piece of marble is the ideal surface for puff pastry) with your rolling pin (preferably a French rolling pin without handles), press on the dough to flatten it and then roll it into a 10" square. Keep the top and bottom of the dough well floured to prevent sticking and lift the dough and move it around frequently. Starting from the center of the square, roll out over each corner to create a thick center pad with "ears," or flaps.

Place the cold butter in the middle of the dough and fold the ears over the butter, stretching them as needed so that they overlap slightly and encase the butter completely. (If you have to stretch the dough, stretch it from all over; don't just pull the ends) you should now have a package that is 8" square.

To make great puff pastry, it is important to keep the dough cold at all times. There are specified times for chilling the dough, but if your room is warm, or you work slowly, or you find that for no particular reason the butter starts to ooze out of the pastry, cover the dough with plastic wrap and refrigerate it . You can stop at any point in the process and continue at your convenience or when the dough is properly chilled.

Making the Turns:

Gently but firmly press the rolling pin against the top and bottom edges of the square (this will help keep it square). Then, keeping the work surface and the top of the dough well floured to prevent sticking, roll the dough into a rectangle that is three times as long as the square you started with, about 24" (don't worry about the width of the rectangle: if you get the 24", everything else will work itself out.) With this first roll, it is particularly important that the butter be rolled evenly along the length and width of the rectangle; check when you start rolling that the butter is moving along well, and roll a bit harder or more evenly, if necessary, to get a smooth, even dough-butter sandwich (use your arm-strength!).

With a pastry brush, brush off the excess flour from the top of the dough, and fold the rectangle up from the bottom and down from the top in thirds, like a business letter, brushing off the excess flour. You have completed one turn.

Rotate the dough so that the closed fold is to your left, like the spine of a book. Repeat the rolling and folding process, rolling the dough to a length of 24" and then folding it in thirds. This is the second turn.

Chilling the Dough:

If the dough is still cool and no butter is oozing out, you can give the dough another two turns now. If the condition of the dough is iffy, wrap it in plastic wrap and refrigerate it for at least 30 minutes. Each time you refrigerate the dough, mark the number of turns you've completed by indenting the dough with your fingertips. It is best to refrigerate the dough for 30 to 60 minutes between each set of two turns.

The total number of turns needed is six. If you prefer, you can give the dough just four turns now, chill it overnight, and do the last two turns the next day. Puff pastry is extremely flexible in this regard. However, no matter how you arrange your schedule, you should plan to chill the dough for at least an hour before cutting or shaping it.

Steph’s extra tips:

-While this is not included in the original recipe we are using (and I did not do this in my own trials), many puff pastry recipes use a teaspoon or two of white vinegar or lemon juice, added to the ice water, in the détrempe dough. This adds acidity, which relaxes the gluten in the dough by breaking down the proteins, making rolling easier. You are welcome to try this if you wish.

-Keep things cool by using the refrigerator as your friend! If you see any butter starting to leak through the dough during the turning process, rub a little flour on the exposed dough and chill straight away. Although you should certainly chill the dough for 30 to 60 minutes between each set of two turns, if you feel the dough getting to soft or hard to work with at any point, pop in the fridge for a rest.

-Not to sound contradictory, but if you chill your paton longer than the recommended time between turns, the butter can firm up too much. If this seems to be the case, I advise letting it sit at room temperature for 5-10 minutes to give it a chance to soften before proceeding to roll. You don't want the hard butter to separate into chuncks or break through the dough...you want it to roll evenly, in a continuous layer.

-Roll the puff pastry gently but firmly, and don’t roll your pin over the edges, which will prevent them from rising properly. Don't roll your puff thinner than about about 1/8 to 1/4-inch (3-6 mm) thick, or you will not get the rise you are looking for.

-Try to keep “neat” edges and corners during the rolling and turning process, so the layers are properly aligned. Give the edges of the paton a scooch with your rolling pin or a bench scraper to keep straight edges and 90-degree corners.

-Brush off excess flour before turning dough and after rolling.

-Make clean cuts. Don’t drag your knife through the puff or twist your cutters too much, which can inhibit rise.

-When egg washing puff pastry, try not to let extra egg wash drip down the cut edges, which can also inhibit rise.

-Extra puff pastry dough freezes beautifully. It’s best to roll it into a sheet about 1/8 to 1/4-inch thick (similar to store-bought puff) and freeze firm on a lined baking sheet. Then you can easily wrap the sheet in plastic, then foil (and if you have a sealable plastic bag big enough, place the wrapped dough inside) and return to the freezer for up to a few months. Defrost in the refrigerator when ready to use.

-You can also freeze well-wrapped, unbaked cut and shaped puff pastry (i.e., unbaked vols-au-vent shells). Bake from frozen, without thawing first.

-Homemade puff pastry is precious stuff, so save any clean scraps. Stack or overlap them, rather than balling them up, to help keep the integrity of the layers. Then give them a singe “turn” and gently re-roll. Scrap puff can be used for applications where a super-high rise is not necessary (such as palmiers, cheese straws, napoleons, or even the bottom bases for your vols-au-vent).

Forming and Baking the Vols-au-Vent

Yield: 1/3 of the puff pastry recipe below will yield about 8-10 1.5” vols-au-vent or 4 4” vols-au-vent

In addition to the equipment listed above, you will need:
-well-chilled puff pastry dough (recipe below)
-egg wash (1 egg or yolk beaten with a small amount of water)
-your filling of choice

Line a baking sheet with parchment and set aside.

Using a knife or metal bench scraper, divided your chilled puff pastry dough into three equal pieces. Work with one piece of the dough, and leave the rest wrapped and chilled. (If you are looking to make more vols-au-vent than the yield stated above, you can roll and cut the remaining two pieces of dough as well…if not, then leave refrigerated for the time being or prepare it for longer-term freezer storage. See the “Tips” section below for more storage info.)

On a lightly floured surface, roll the piece of dough into a rectangle about 1/8 to 1/4-inch (3-6 mm) thick. Transfer it to the baking sheet and refrigerate for about 10 minutes before proceeding with the cutting.

(This assumes you will be using round cutters, but if you do not have them, it is possible to cut square vols-au-vents using a sharp chef’s knife.) For smaller, hors d'oeuvre sized vols-au-vent, use a 1.5” round cutter to cut out 8-10 circles. For larger sized vols-au-vent, fit for a main course or dessert, use a 4” cutter to cut out about 4 circles. Make clean, sharp cuts and try not to twist your cutters back and forth or drag your knife through the dough. Half of these rounds will be for the bases, and the other half will be for the sides. (Save any scrap by stacking—not wadding up—the pieces…they can be re-rolled and used if you need extra dough. If you do need to re-roll scrap to get enough disks, be sure to use any rounds cut from it for the bases, not the ring-shaped sides.)

Using a ¾-inch cutter for small vols-au-vent, or a 2- to 2.5-inch round cutter for large, cut centers from half of the rounds to make rings. These rings will become the sides of the vols-au-vent, while the solid disks will be the bottoms. You can either save the center cut-outs to bake off as little “caps” for you vols-au-vent, or put them in the scrap pile.

Dock the solid bottom rounds with a fork (prick them lightly, making sure not to go all the way through the pastry) and lightly brush them with egg wash. Place the rings directly on top of the bottom rounds and very lightly press them to adhere. Brush the top rings lightly with egg wash, trying not to drip any down the sides (which may inhibit rise). If you are using the little “caps,” dock and egg wash them as well.

Refrigerate the assembled vols-au-vent on the lined baking sheet while you pre-heat the oven to 400ºF (200ºC). (You could also cover and refrigerate them for a few hours at this point.)

Once the oven is heated, remove the sheet from the refrigerator and place a silicon baking mat (preferred because of its weight) or another sheet of parchment over top of the shells. This will help them rise evenly. Bake the shells until they have risen and begin to brown, about 10-15 minutes depending on their size. Reduce the oven temperature to 350ºF (180ºC), and remove the silicon mat or parchment sheet from the top of the vols-au-vent. If the centers have risen up inside the vols-au-vent, you can gently press them down. Continue baking (with no sheet on top) until the layers are golden, about 15-20 minutes more. (If you are baking the center “caps” they will likely be finished well ahead of the shells, so keep an eye on them and remove them from the oven when browned.)

Remove to a rack to cool. Cool to room temperature for cold fillings or to warm for hot fillings.

Fill and serve.

*For additional rise on the larger-sized vols-au-vents, you can stack one or two additional ring layers on top of each other (using egg wash to "glue"). This will give higher sides to larger vols-au-vents, but is not advisable for the smaller ones, whose bases may not be large enough to support the extra weight.

*Although they are at their best filled and eaten soon after baking, baked vols-au-vent shells can be stored airtight for a day.

*Shaped, unbaked vols-au-vent can be wrapped and frozen for up to a month (bake from frozen, egg-washing them first).
Monday, October 5, 2009

Simple and Delicious Yellow Cake

River's birthday cake - candles

My son recently had a birthday, which meant a cake was in order! My mind initially drifted off into thoughts of what wonderful and new recipes I could try out for this special occasion. Then I came back to reality and remembered that this was a soon-to-be four year old that I would be baking for. A rather picky, soon-to-be four year old, to be exact.

So I brought my head back out of the clouds and found something simple. Rather than bake another chocolate cake (not that there's anything wrong with good 'ol chocolate!) I remembered a basic yellow cake recipe I'd seen on Smitten Kitchen not too long ago. Deb had declared it the "best birthday cake" so I knew this had to be a winner.

My son's only request was that it have stars all over it. Ah, he is *so* my son!

River's birthday cake - top


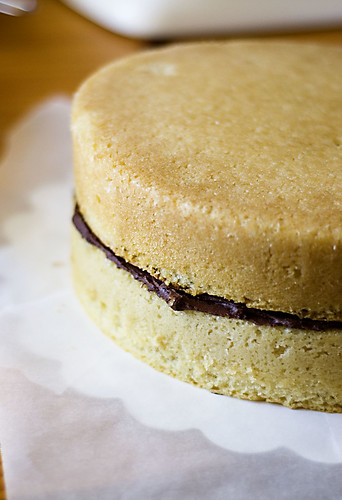
The cake turned out fabulously! It rose beautifully in the cake pans and had a nice very light yellow color. The taste and texture were superb! It stayed moist even in an airtight container on the counter 3 days later (same goes for in the fridge too!).

River's birthday cake - unfrosted cake


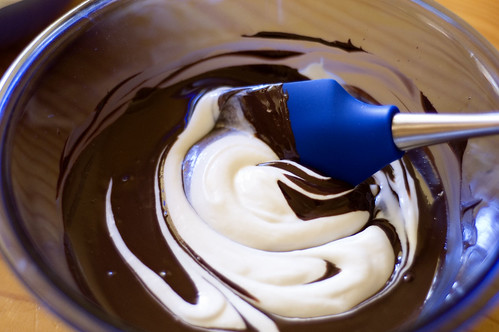
The frosting was equally as good and was a dream to work with. This stuff spreads so well and wants to be nice and smooth for you. It's super easy to make and has a very strong chocolate flavor, so be sure to use a good quality chocolate.
River's birthday cake - 10 lbs chocolate
finally broke into this 10 pound bar of Guittard chocolate


River's birthday cake - making the frosting
making the frosting - no mixer required


River's birthday cake - birthday boy
the birthday boy

River's birthday cake - bashful
sometimes he gets momentarily shy

River's birthday cake - blowing out the candles


River's birthday cake - slice


Best Yellow Layer Cake
via Smitten Kitchen

Yield: Two 9-inch round, 2-inch tall cake layers

4 cups plus 2 tablespoons cake flour (not self-rising)
2 teaspoons baking powder
1 1/2 teaspoons baking soda
1 teaspoon salt
2 sticks (1 cup) unsalted butter, softened
2 cups sugar
2 teaspoons pure vanilla extract
4 large eggs, at room temperature
2 cups buttermilk, well-shaken

Preheat oven to 350°F. Butter and flour two 9-inch round cake pans (Alternately, you can use a cooking spray, either with just butter or butter and flour to speed this process up.)

Sift together flour, baking powder, baking soda, and salt in a medium bowl. In a large mixing bowl, beat butter and sugar in a large bowl with an electric mixer at medium speed until pale and fluffy (about 3-5 minutes), then beat in vanilla. Add eggs 1 at a time, beating well and scraping down the bowl after each addition. At low speed, beat in buttermilk until just combined (mixture will look curdled). Add flour mixture in three batches, mixing until each addition is just incorporated.

Spread batter evenly in cake pan, then rap pan on counter several times to eliminate air bubbles. Bake until golden and a wooden pick inserted in center of cake comes out clean, 35 to 40 minutes. Cool in pan on a rack 10 minutes, then run a knife around edge of pan. Invert onto rack and discard parchment, then cool completely, about 1 hour.

Chocolate Sour Cream Frosting
via Smitten Kitchen

Makes 5 cups of frosting, or enough to generously frost and fill a two layer 9-inch cake (with some left over)

15 ounces semisweet or bittersweet chocolate, chopped (use milk chocolate if you like it sweeter)
1 1/4 teaspoons instant espresso
2 1/4 cups sour cream, at room temperature (very important!)
1/4 to 1/2 cup light corn syrup
3/4 teaspoon vanilla extract

Combine the chocolate and espresso powder,in the top of a double-boiler or in a heatproof bowl over simmering water. Stir until the chocolate is melted. (Alternately, you can melt the chocolate in a microwave for 30 seconds, stirring well, and then heating in 15 second increments, stirring between each, until the chocolate is melted.) Remove from heat and let chocolate cool until tepid.

Whisk together the sour cream, 1/4 cup of the corn syrup and vanilla extract until combined. Add the tepid chocolate slowly and stir quickly until the mixture is uniform. Taste for sweetness, and if needed, add additional corn syrup in one tablespoon increments until desired level of sweetness is achieved.

Let cool in the refrigerator until the frosting is a spreadable consistency. This should not take more than 30 minutes. Should the frosting become too thick or stiff, just leave it out until it softens again.

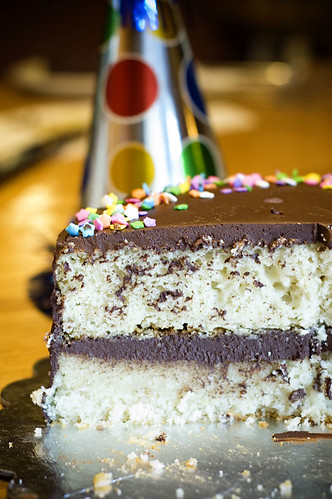
River's birthday cake - cross section

Wednesday, September 30, 2009

My favorite place

red and blue


Don't you hate it when you finally find time to sit down and write a post only to find that everything you type is complete and utter drivel? Things come out as half thoughts and in short, halting sentences? Bleh. yeah, that's me today.

Rather than give up and wait for a seemingly better time that I know will not arise, I will continue on. I didn't really want to do much blabbering anyway; what I really wanted was to show some photos from my recent trip to New York.

union square


I love NYC. Well, that's an understatement. I lurrrrve it. Not just the city itself, but also Brooklyn, which happens to be where my oldest and dearest friend has lived for the past decade. We've known each other since we were both eight years old, which, we realized, means we've known each other for 20 years! Yeah, twenty years. Wow.

walking to the east village


I don't have a recipe today, but a review of sorts. It's food related.

If you ever find yourself in Brooklyn (Clinton Hill, to be exact), needing a little coffee, or something to eat, I know of a place you should go.

It's this place, right here. Outpost.

home away from home


Okay, I might be just a tiny bit biased (aforementioned long time dearest friend is co-owner) BUT - I would still love this place even if that weren't a factor.

How could you not? Just look around...

brick wall art


coffee served


I love the decor, but I'm not quite sure how to describe it. No need though, as I think it really speaks for itself.

hutch

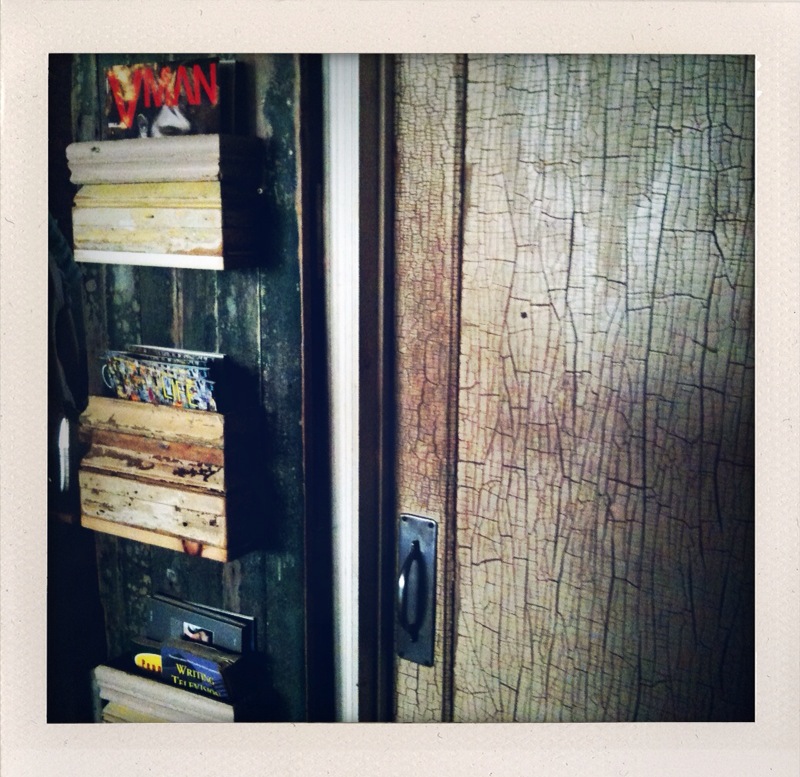
crackle

chandelier

coffee corner

orange wall


The coffee here is amazing (better than anything I've had here in Seattle and that is absolute truth) and the food is great too. They have sandwiches, chili (both vegetarian and turkey), soup, mac and cheese, freshly made juices, pastries and even beer and wine if you're so inclined.

la marzocco


condiment bar


tea


They throw events and parties every once in a while. Sometimes there's a DJ.

The garden out back is wonderful in the warm weather. (it's a lot bigger than this)

garden seating


Next to it is the most beautiful wall I've ever seen. They didn't even make it this way, this is just how it was when they moved in. This picture doesn't do it justice.

that beautiful wall


the most beautiful wall


Anyway, if you're in the neighborhood, you should really stop in.

1014 Fulton Street, between Grand and Classon.

orange bldg


Here are some other random photos from my trip. I didn't take as many pictures as I thought I would - I've already done all the touristy things, so I felt a bit of 'been there, done that' as far as those types of pics go. I did however, discover this super awesome iphone app called ShakeItPhoto that I couldn't stop using. I never would've thought some of my favorite pictures would come from using my craptastic iphone camera! But this app is gold and totally worth $0.99 (and is the only app I've ever paid for).

passing through park slope

brooklyn stoop

a calm soho sidewalk

beautiful stoop
can you tell I love front stoops?


les halles
because I'm a bit nutty for Anthony Bourdain

passing thru

soho apt
I could squeeze myself into this tiny soho apartment....I'd just have to get rid of 90% of my personal possessions

sunny in soho
soho is one of my favorite neighborhoods

margarita time

west village bldg
west village

maggie brown's magnificent wallpaper
maggie brown- awesome brunch and the wallpaper is like velvet

chasing the sunset
until next time...