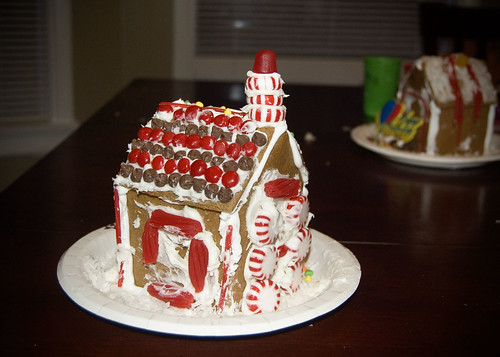
I was really excited when I saw what this month's Daring Baker's Challenge was because this is something I have been doing for the past four or five years now. The very first one I made was so much fun, and such a success that making a gingerbread house from scratch has become a holiday tradition of mine.
The December 2009 Daring Bakers’ challenge was brought to you by Anna of Very Small Anna and Y of Lemonpi. They chose to challenge Daring Bakers’ everywhere to bake and assemble a gingerbread house from scratch. They chose recipes from Good Housekeeping and from The Great Scandinavian Baking Book as the challenge recipes.
For most of us, this is a busy time of year. For me, however, it's busier than the average person. In the months of November and December there are 7 family birthdays including those of my mom, my sister, my niece, my daughter and also my own. Add to that this year the brilliant idea of moving over the Thanksgiving weekend and you've got yourself enough going on to cause a near total and complete melt down! Luckily, I survived, but to be honest, we're still living partially out of boxes and I continue to have clothing packed away in every suitcase I own. All in due time (I hope).
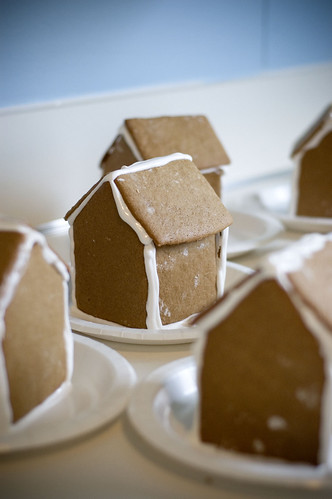
My daughter turned 7 on the 21st so the weekend before we had a birthday party for her with 7 of her friends. As the main activity I decided to make each girl her own little gingerbread house to decorate. Originally I was going to make our usual large gingerbread house that we decorate together as a family along with the smaller ones for the birthday party. Well, apparently I have a thing for biting off way more than I can chew because I ended up scrapping the large gingerbread house this year (to save my sanity - or what little bits of it I actually have left) and only made the smaller ones. I can laugh about it now, but let me tell you, I was frantically rolling out dough and cutting and baking tray after tray of little gingerbread pieces the night before the party, cursing myself for coming up with such an idea. "Oh, no problem! I'll just whip up some homemade gingerbread houses, yeah! So simple and easy! Why go the easy route and use graham crackers when I can make the gingerbread from scratch! GREAT IDEA!"**
**Note: NOT a great idea!
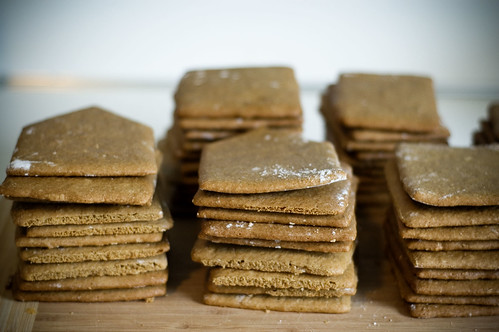
Thankfully, I did manage to get it all done, and the whole party was a success. The girls were very excited about decorating their houses and it was the perfect activity for them. It was great to see their faces light up when they realized they would get to take home their gingerbread house and get to eat it too.
The Daring Bakers hosts chose two different gingerbread recipes which you can find here and here. I chose to go with the recipe I've been using for years now because it's familiar and it works really well for me.

Gingerbread Dough
1 cup butter, at room temperature
1 3/4 cups brown sugar
1 1/4 cups granulated sugar
2 tablespoons molasses
6 eggs
6 cups all purpose flour
2 teaspoons baking soda
1 tablespoon ground ginger
1 tablespoon cinnamon
1 tablespoon allspice
1. Using a stand mixer, cream the butter and sugars until well blended. Beat in the molasses and the eggs one at a time.
2. In a separate large bowl, sift together the flour, baking soda and spices.
3. Slowly incorporate the flour/spice mixture into the creamed butter/sugar mixture until combined.
4. Cover and refrigerate the dough for at least 1 hour.
While the dough is chilling, make your house templates. Also, preheat your oven to 325° F.
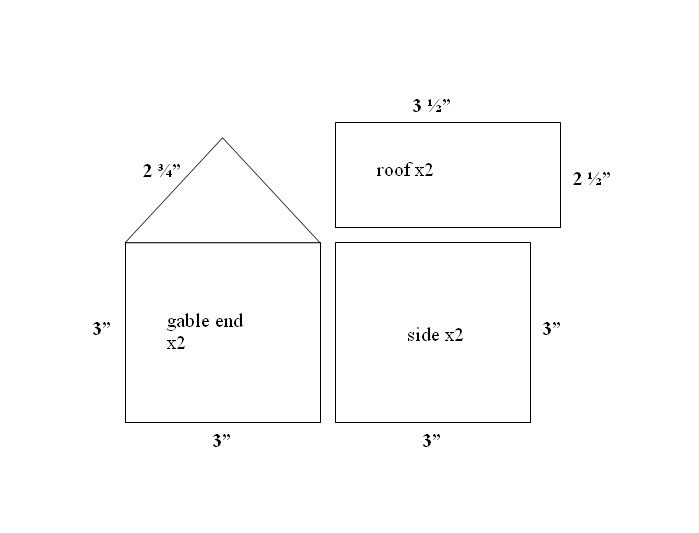
Here is what I used as my templates. I cut the pieces out of thick cardboard and cut each piece individually with a sharp knife.
When your dough is thoroughly chilled, roll it out on a generously floured surface to approximately between 1/4 and 1/8th - inch thick. Once this dough gets to about 1/8 - inch thickness, it has a tendency to stick to the counter top (or rolling pin) really badly unless you're very careful about keeping everything well floured. Also, keep in mind that the dough will stretch a bit when you lift it to transfer to the baking sheet. If you're having problems with it being too sticky, refrigerate the dough for a while longer and re-roll it out thicker and that should help.
5. Lay your cardboard templates on the rolled out dough and working quickly to keep the dough cold, cut out your pieces and gently transfer to a silpat or parchment lined baking sheet.
6. Bake for approximately 18 minutes and transfer to a cooling rack. Let pieces dry overnight, uncovered.
To assemble, you will need royal icing. It dries fairly quickly and is almost as tough as concrete! But be forewarned, it doesn't taste good. In fact, it's horrible. It does, however, do the job it's supposed to quite well.
Royal Icing
3 egg whites
1 1/2 teaspoons cream of tartar
3 1/2 cups confectioners sugar
1. In a stand mixer, beat the egg whites until foamy. Add the cream of tartar. Beat until the egg whites are stiff but not dry.
2. Slowly incorporate all the confectioners sugar and beat until well combined.
3. Transfer icing to a pastry bag with a plain tip and you are ready to go.
Assembly
Start out with a gable end (that would be the one with the point in it) and a square side piece. Don't be shy with the royal icing. Yes, you can over do it, but generally as long as your icing is freshly made, you can't really use too much. Be sure to use a nice thick bead of icing on the bottom of each piece and if any of your pieces don't quite match up, just fill in any gaps with extra icing.
I like to let the four walls dry just a bit before I put the roof on, just to be sure things stay together. It really helps to have an extra set of hands, but if you're going totally solo, I've found that cans work really well at holding things up as they dry.
Once your house is fully constructed, let it dry for a couple of hours (or overnight) and you are ready to decorate! There is no limit to what you can use to decorate your house with. Things I've used in the past include: necco wafers (for roof tiles), Nilla wafers (also as roof tiles), dots, spice drops, candy canes, red hots, red licorice, coconut flakes, chocolate chips, M&M's, etc. etc. etc. I tend to just grab any and all red and green candies I can find.
All in all, this really is one of my favorite holiday projects and if you've never made your own, I highly encourage it!
