Wednesday, May 27, 2009

Daring Bakers - Apple Strudel

The May Daring Bakers’ challenge was hosted by Linda of make life sweeter! and Courtney of Coco Cooks. They chose Apple Strudel from the recipe book Kaffeehaus: Exquisite Desserts from the Classic Cafés of Vienna, Budapest and Prague by Rick Rodgers.

apple strudel - complete

I have to admit, when I found out what this month's Daring Bakers challenge was, I was a little disappointed. Apple Strudel? Huh? Sure, I've heard of it, but after reading through the recipe I realized I've never even had real apple strudel. I wasn't quite sure what was going to be so challenging about it until I realized it was the dough that was the challenge - essentially, we'd be making phyllo dough! My heart sank. I was instantly turned off and was dreading this challenge. It just didn't sound like fun, or like the end result would be very yummy. I contemplated opting out, and almost did in fact.

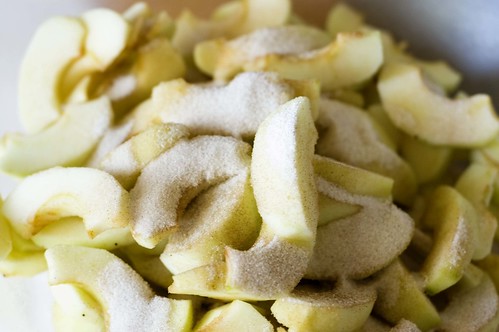
apple strudel - apples

However, the nature of being in a group like the Daring Bakers is to challenge yourself and to try things you might never have otherwise considered. After contemplating this, I had a change of heart and decided to give it a go.
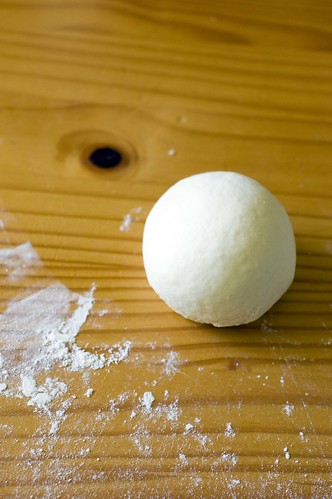
apple strudel - dough ball
from this...

apple strudel - rolled dough
to this!

Everything seemed fairly simple and I didn't really need to buy any ingredients except the apples. One thing that threw me was that the dough is supposed to be rolled out on a large piece of cloth - about 2 feet by 3 feet - and I didn't have anything that large and of the right material to use. The dough is to be paper thin and the cloth helps you roll the entire thing up once you add the filling.
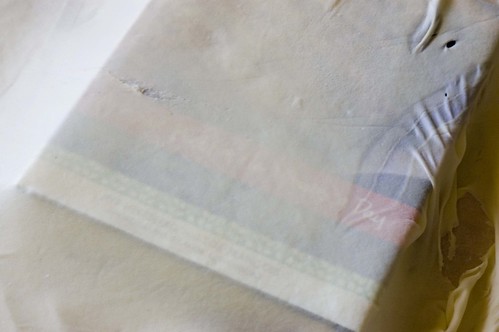
apple strudel - dough thinness
almost thin enough to read through

I certainly didn't want to go buy anything since I already was positive I'd never be making this recipe again (hint: I was wrong!) so I ended up taping down a few sheets of parchment paper instead. That was a total failure! Here's a little tidbit for ya - tape doesn't stick to parchment for longer than, oh, about 2 minutes (and about 10 seconds if you're attempting to roll anything out on it!). Of course, I didn't discover this until I was already rolling out the dough and the pieces of parchment started sliding all around underneath. Luckily, this dough is very easy to work with and I didn't have any problems with it sticking despite my parchment problems.
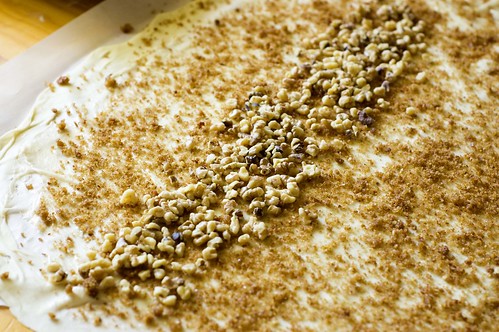
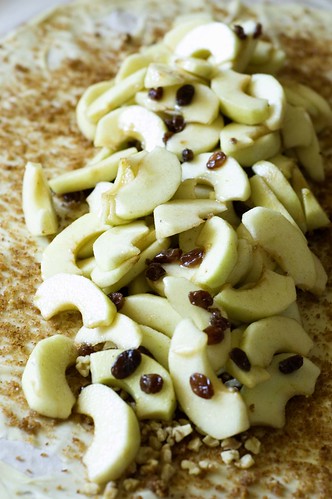
apple strudel - filling the dough

apple strudel - ready to roll

I was able to get my dough thin enough for my liking (probably could've done a better job if I'd had the cloth to use) without too many tears and the whole thing came together quite easily. The final product wasn't the prettiest looking creation, but I was totally surprised when I took a bite - it was delicious!

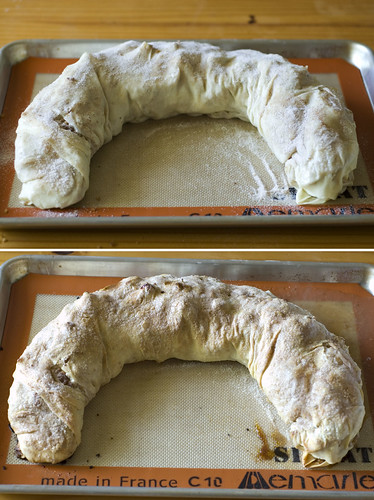
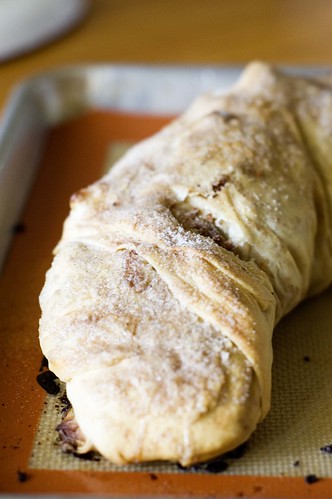
apple strudel - pre and post bake
pre and post bake

The dough was wonderfully flaky and crisp and surprisingly had a great flavor to it. I would've preferred more crust to apple ratio, but all in all, I was totally surprised by the end result. I felt bad for wanting to brush this recipe off in the first place and was so happy I didn't! I had followed the recipe exactly since I was feeling very uninspired and wasn't even sure of what the end result would be like, but after tasting it, wheels were already turning and thinking of other ways I can use this dough (this, for example). It really is THAT good.

apple strudel - inside

I can honestly say, I will make this recipe again for sure, and when I do, I'll even take the extra step of finding a large piece of cloth I can roll the dough out on as I know it will help produce an even better result.

A big thanks to Courtney and Linda! As apprehensive as I was in the beginning, I'm very pleased with this recipe and for the challenge!

Preparation time
Total: 2 hours 15 minutes – 3 hours 30 minutes
15-20 min to make dough
30-90 min to let dough rest/to prepare the filling
20-30 min to roll out and stretch dough
10 min to fill and roll dough
30 min to bake
30 min to cool

Apple Strudel
from “Kaffeehaus – Exquisite Desserts from the Classic Cafés of Vienna, Budapest and Prague” by Rick Rodgers

2 tablespoons (30 ml) golden rum
3 tablespoons (45 ml) raisins
1/4 teaspoon ground cinnamon
1/3 cup plus 1 tablespoon (80 g) sugar
1/2 cup (1 stick / 115 g) unsalted butter, melted, divided
1 1/2 cups (350 ml) fresh bread crumbs
strudel dough (recipe below)
1/2 cup (120 ml, about 60 g) coarsely chopped walnuts
2 pounds (900 g) tart cooking apples, peeled, cored and cut into ¼ inch-thick slices (use apples that hold their shape during baking)

1. Mix the rum and raisins in a bowl. Mix the cinnamon and sugar in another bowl.

2. Heat 3 tablespoons of the butter in a large skillet over medium-high. Add the breadcrumbs and cook whilst stirring until golden and toasted. This will take about 3 minutes. Let it cool completely.

3. Put the rack in the upper third of the oven and preheat the oven to 400°F (200°C). Line a large baking sheet with baking paper (parchment paper). Make the strudel dough as described below. Spread about 3 tablespoons of the remaining melted butter over the dough using your hands (a bristle brush could tear the dough, you could use a special feather pastry brush instead of your hands). Sprinkle the buttered dough with the bread crumbs. Spread the walnuts about 3 inches (8 cm) from the short edge of the dough in a 6-inch-(15cm)-wide strip. Mix the apples with the raisins (including the rum), and the cinnamon sugar. Spread the mixture over the walnuts.

4. Fold the short end of the dough onto the filling. Lift the tablecloth at the short end of the dough so that the strudel rolls onto itself. Transfer the strudel to the prepared baking sheet by lifting it. Curve it into a horseshoe to fit. Tuck the ends under the strudel. Brush the top with the remaining melted butter.

5. Bake the strudel for about 30 minutes or until it is deep golden brown. Cool for at least 30 minutes before slicing. Use a serrated knife and serve either warm or at room temperature. It is best on the day it is baked.

Strudel dough
from “Kaffeehaus – Exquisite Desserts from the Classic Cafés of Vienna, Budapest and Prague” by Rick Rodgers

1 1/3 cups (200 g) unbleached flour
1/8 teaspoon salt7 tablespoons (105 ml) water, plus more if needed
2 tablespoons (30 ml) vegetable oil, plus additional for coating the dough
1/2 teaspoon cider vinegar

1. Combine the flour and salt in a stand-mixer fitted with the paddle attachment. Mix the water, oil and vinegar in a measuring cup. Add the water/oil mixture to the flour with the mixer on low speed. You will get a soft dough. Make sure it is not too dry, add a little more water if necessary.Take the dough out of the mixer. Change to the dough hook. Put the dough ball back in the mixer. Let the dough knead on medium until you get a soft dough ball with a somewhat rough surface.

2. Take the dough out of the mixer and continue kneading by hand on an unfloured work surface. Knead for about 2 minutes. Pick up the dough and throw it down hard onto your working surface occasionally.Shape the dough into a ball and transfer it to a plate. Oil the top of the dough ball lightly. Cover the ball tightly with plastic wrap. Allow to stand for 30-90 minutes (longer is better).

3. It would be best if you have a work area that you can walk around on all sides like a 36 inch (90 cm) round table or a work surface of 23 x 38 inches (60 x 100 cm). Cover your working area with table cloth, dust it with flour and rub it into the fabric. Put your dough ball in the middle and roll it out as much as you can.Pick the dough up by holding it by an edge. This way the weight of the dough and gravity can help stretching it as it hangs. Using the back of your hands to gently stretch and pull the dough. You can use your forearms to support it.

4. The dough will become too large to hold. Put it on your work surface. Leave the thicker edge of the dough to hang over the edge of the table. Place your hands underneath the dough and stretch and pull the dough thinner using the backs of your hands. Stretch and pull the dough until it's about 2 feet (60 cm) wide and 3 feet (90 cm) long, it will be tissue-thin by this time. Cut away the thick dough around the edges with scissors. The dough is now ready to be filled.

Tips
- The tablecloth can be cotton or polyster
- Before pulling and stretching the dough, remove your jewelry from hands and wrists, and wear short-sleeves
- To make it easier to pull the dough, you can use your hip to secure the dough against the edge of the table
- Few small holes in the dough is not a problem as the dough will be rolled, making (most of) the holes invisible

Saturday, May 23, 2009

Friday night take out

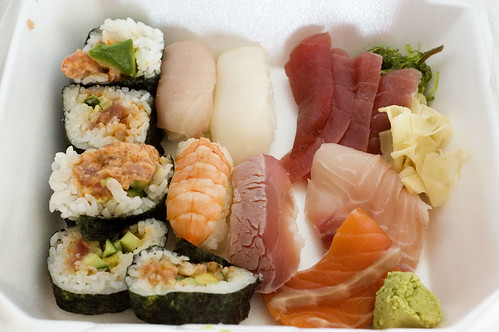
sushi and sashimi combo

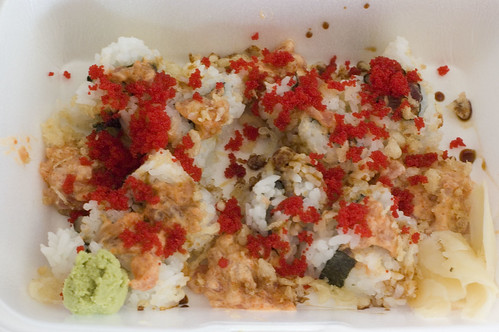
spicy tuna crunchy habenero roll
spicy tuna crunchy habanero roll

Mmm. Sushi. This is what I had for dinner last night. I had never tried raw fish sushi until last July and have had it just about once a week ever since! Somehow I always knew that if I tried sushi, I would really like it. It was definitely love at first bite. I was always a bit scared away by the 'raw' factor - I've been a vegetarian since I was about 15 or so, but I started eating fish (cooked that is) about 7 years ago when I was pregnant with my daughter for the added protein and have continued to eat seafood ever since. Mostly just the occasional salmon fillet, that is, until I discovered sushi.

I call myself 'vegetarian' but I suppose I'm actually pescetarian. No one really knows that term though, so I just say I also eat fish. Now, of course I do realize that the very thought of me referring to myself as vegetarian quite possibly would instantaneously bunch up the panties of many hard core vegetarians and vegans but I'm not hardcore like that lol. I just do what works for me.

At any rate, the sushi and sashimi combo was awesome. The spicy tuna crunchy habanero roll was equally amazing. It doesn't look so pretty in the photo, but it sure was tasty! I've never seen such red fish roe before - it was much brighter in person than in the pic and it was gorgeous. The roll itself was spicy and a bit creamy and it had flecks of tempura crumbs that added a nice crunch to it. All in all, it was a great meal to start the long weekend!

Monday, May 18, 2009

Spur of the moment yumminess

chocolate muffins

I love when spur of the moment decisions turn out better than expected. Such was the case with these chocolate muffins.

I had a craving for something to snack on, and since I had nothing, my only choice was to make something. Surprisingly I didn't really feel like baking anything but hunger gave out over the desire to be lazy. I was really uninspired and even though I have a long list of things I want to make, nothing was jumping out at me. I briefly contemplated a cinnamon and sugar muffin that's been on my list, but wasn't really feeling it. Muffins, however had piqued my interest.

I wandered over to foodgawker (or was it tastespotting?) and typed in 'muffins' in the search box. Right on the first page of results I saw a chocolate muffin from Baking and Books that jumped out at me. I read through the ingredients and I had everything on hand - we had a winner! It seemed simple and easy and exactly what would hit the spot.

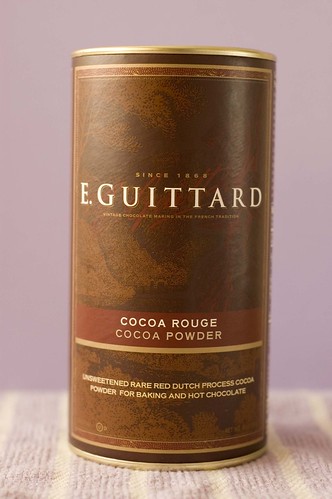
I was excited to try out some new cocoa powder I had recently picked up.
guittard cocoa rouge

Not really sure why it's called 'rouge' as it's not red in the least
guittard cocoa rouge

What I liked most about this particular recipe was that it didn't have a lot of oil or butter (only 2 tablespoons), which I ended up replacing entirely with applesauce to make them even 'healthier'. I made a few other modifications to the recipe as well. You can find the original recipe here. Below is the recipe how I made it.

Irresistible Chocolate Muffins
adapted from Baking and Books

2 cups all purpose flour
1/2 cup unsweetened cocoa powder
1 1/3 cup dark brown sugar (packed)
1/2 teaspoon baking soda
2 teaspoons baking powder
1/2 teaspoon salt
1 1/4 cups low fat buttermilk
1 egg
2 tablespoons applesauce
1 teaspoon vanilla extract
1 cup milk chocolate chips
1/3 cup chopped pecans

1. Preheat oven to 350 F and prepare your muffin tin by spraying with nonstick spray.

2. In a medium bowl combine the flour, cocoa powder, brown sugar, baking soda, baking powder and salt and mix with a whisk.

3. In a large bowl combine the buttermilk, egg, applesauce and vanilla.

4. Add the wet ingredients to the dry and mix to combine; add the chocolate chips and pecans and fill each muffin cup about 3/4 full.

5. Bake for 20-25 minutes (for regular sized muffin tins or about 13 minutes for mini muffins) or until a toothpick inserted comes out clean.

These muffins rise beautifully and are incredibly moist for not containing any oil or butter. I was able to get 24 mini sized muffins and 6 regular sized muffins out of one batch of batter. They're perfect for curbing any chocolate craving you might have - the only problem is stopping yourself from eating too many! (I speak from experience here people, trust me.)

Enjoy!

chocolate muffins inside

Wednesday, May 13, 2009

An afternoon macaron hunting

A gorgeous, sunny, bright and warm Saturday afternoon. And bakeries. With macarons. What could be better?

Recently on a trip to the land where the sun never stops shinning, I had the opportunity to hunt down some of my favorite treats. It was off to Beverly Hills to hit up three different bakeries known for their macarons and I couldn't have been more excited.

First stop was a cute little patisserie and cafe called La Provence. I never would've suspected a little gem like La Provence to reside in a strip mall type setting, but I was pleasantly surprised when I walked inside. It's very small, but had outside seating and seemed like a popular spot as it was quite busy.

I was in awe over the pastry cases and of course was immediately drawn to the assortment of macarons that were offered.

la provence macaron assortment
aren't they pretty?

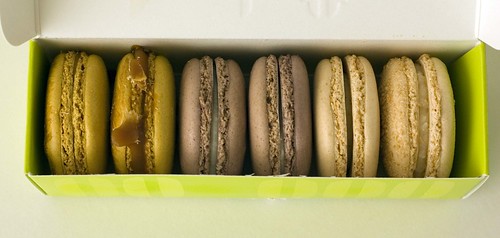
I already knew I wanted to try something I'd never had before, so I chose lavender and rose - two flavors that highly intrigued me. We also chose two standbys - hazelnut and fleur de sel caramel. And the bonus? A free orange macaron as well! To top off the macaron assortment, we also grabbed one of their red velvet cupcakes. You know, for a little variety. ;)

la provence assortment in box
our assortment


Their macarons were larger and thicker than ones I make at home. They also seemed slightly dryer, but still delicious! The lavender and rose had very subtle flavors that were good, but aren't for everyone. Some might liken them to eating soap or lotion, but hey, soap never tasted so good!

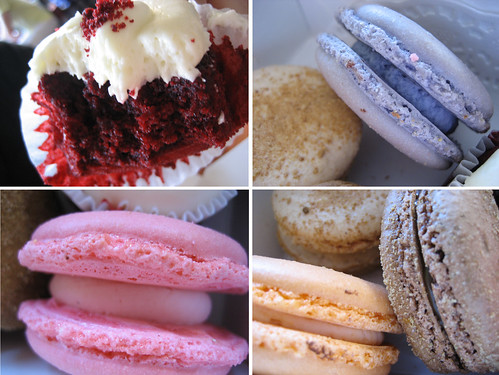
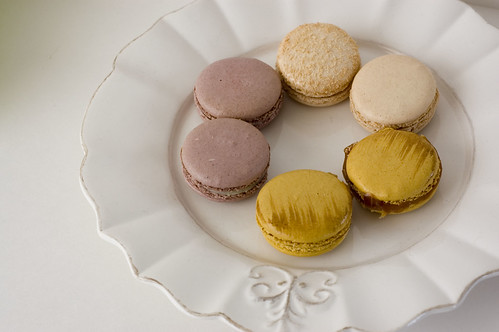
la provence yummies
clockwise: red velvet, hazelnut, lavender, fleur de sel caramel, orange and rose

The hazelnut didn't have much of distinctive flavor that either of us could make out, which was a bit of a disappointment. Orange was good, but honestly I don't remember much about it other than the flavor was subtle just like the others. The real standout was the fleur de sel caramel. Ooh how I love salt on sweet things! There was a perfect amount of salt sprinkled evenly across the outside of the shells (possibly too much for some, but I like a lot) and and equally perfect amount of gooey caramel filing.

Not to leave out the red velvet cupcake! It was incredibly moist and the cream cheese frosting was perfect in flavor and in frosting to cake ratio. I think it might have been the best red velvet I've ever had! Though, admittedly, I haven't had that much red velvet in my life. However, this one was excellent.

My only gripe about La Provence....they they call them "Parisian Macaroons". Yep, with two "o's". Someone alert the grammar police! Seriously, I know macarons are unknown to most Americans, but really? Do we need to miseducate the uninformed? Bah. *steps off soap box*

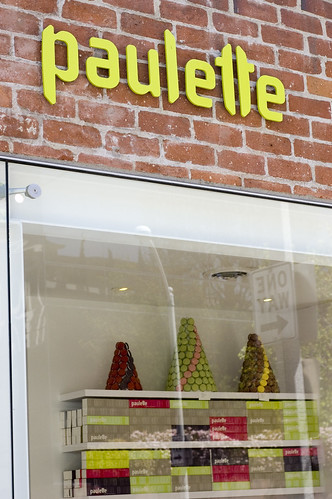
Up next was Paulette, a gorgeous specialty shop that only sells macarons. I think I squealed with delight as soon as I saw the place.

paulette

It was everything I had expected. We lucked out and were the only ones there and all the flavors were still available. I must've stared in awe for a good five minutes before making any selections! The woman working (not Paulette - yep, we asked lol) was really nice and patient with us (me). She even had no objections when I asked to take pictures.

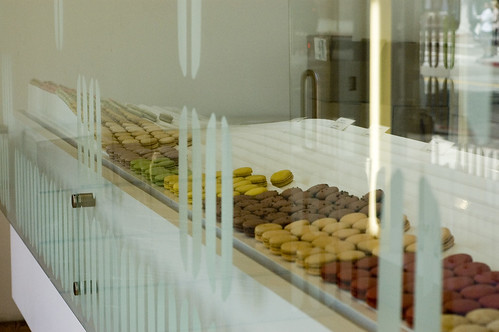
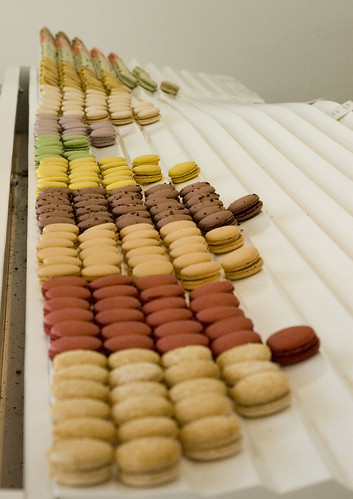
paulette macarons
in front of the glass

paulette behind the glass
Behind the glass...oooh!

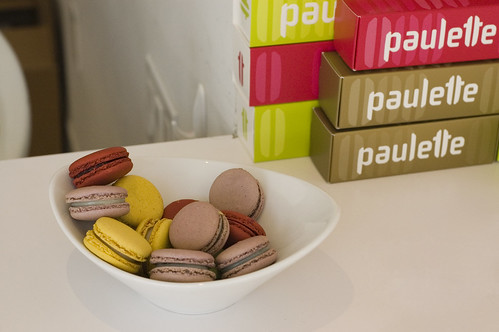
One of the best things about Paulette...the SAMPLE BOWL!! Check it out!

samples at paulette

They're only slightly smaller than the ones for sale and totally up for grabs! Now, normally, I'm really not into reaching into a community sample pile of goods, no matter what it is unless everything is in it's own little plastic cup or paper liner separating everything and thus, less of a chance of other people's grubby fingers gettin' all over the tasty bites. But, I had no qualms this time around. I was intrigued by the violet cassis flavor so I tried that one. OMG. Wow. I'd never had anything like it and I was blown away. Violet flavored ganache - white chocolate? I dunno, but it didn't taste like white chocolate at all, but you could definitely taste the violet, which I found much yummier than lavender. And the bonus? A dollup of cassis jam in the middle (also known as black currant). Woweee wow wow!!

After much hemming and hawing we made a selection - honestly I don't recall what we got because we actually came back later in the day to get more lol. I think that first time we got a violet cassis, chocolate, coffee?, caramel? um, yeah, not really sure. However, this was our selection when we came back later that day (it was busier the second time around and the sample bowl was completely empty)

paulette macarons in box
caramel, violet cassis, vanilla and coconut

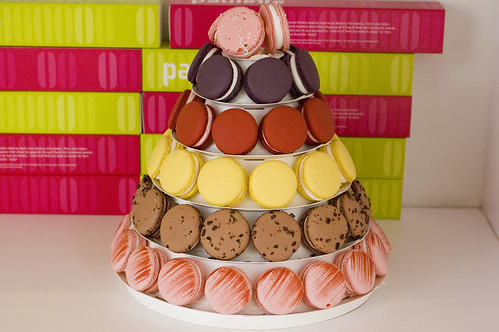
paulette macaron tree
how cool would this be to have at a party?!

The last stop was to be Boule, but much to our dismay, we found it to be closed when we got there! And we're not talking just closed for the day, we're talking totally closed down no longer in business! At the time their website was still up and there was no mention of their stores being closed but since then they've removed all traces of the bakery from their site. Big disappointment, but all in all the day was very much a success.

Hands down the best macaron I had was the violet cassis at Paulette, and believe me when I say the wheels were already turning after that first bite trying to figure out how I could make the same macaron at home. Experiments are already underway and I will report back if I come up with anything worth mentioning.

If you ever find yourself in beautiful Beverly Hills, definitely hit up either of these places, they are definitely worth it.

paulette macarons

Saturday, May 2, 2009

Madeleines


Long before I ever discovered the French macaron, I had a little love affair with another French cookie-esque treat: the madeleine.

I bought my first madeleine pan a few years ago. I had wanted one for a very long time, but never actually bought one. One day at Williams Sonoma, I could no longer resist.

While searching for a recipe for my new pan, I then discovered that, what do you know, these things can be tricky to make. At the time I found a bit of a debate on whether or not baking powder should be used as leavening, and apparently a lot about a characteristic "bump" that a true madeleine should posses. All the fuss made me feel a bit intimidated, but I was excited to break in the new pan and chose a recipe and dove right in.

I remember being disappointed at the result; they were very cake like and had no crust whatsoever. Nothing like I was hoping for. I was discouraged and put my new madeleine pan away for future use, when I had more time to find the right recipe.

I recall attempting to make them maybe two or three times after that, but I never found the right recipe. A few months ago I dug out my special pan and tried out a new recipe: meyer lemon madeleines - the first time I had ever used meyer lemons in anything - I'd only just discovered them while browsing the food blogosphere. Once again I was disappointed with the result - I don't know if I had a bad batch of lemons or what, but they left this awful almost burnt lemony flavor taste in your mouth that made you want to immediately go brush your teeth! Away again went the madeleline pan. I was onto macarons at that point anyway.


Recently, for some reason or another I ended up buying a new pan. The scallop-shell shaped pan seen above. I found it for only $8, and being of a less frequently seen shape, I decided to get it. It had been rather cumbersome to have only one pan to use, so I couldn't pass it up. Never mind the fact that I still had yet to find a decent recipe.

As fate would have it, the day I got my new pan, one of my favorite bloggers posted a madeleine recipe, and this one sounded like a doozy! I knew right away that Aran's recipe for orange and brown butter madeleines would inaugurate my new purchase. They sounded incredible: browned butter, orange and almond flour. I had everything I needed on hand. The only catch - in the recipe it calls for the batter to be refrigerated for 4 hours. Definitely not a weeknight endeavor!

On a beautiful Sunday afternoon, after completing my first Daring Baker's challenge, I decided to whip up a batch of these madeleines. I might have put it off for another weekend, what with having already made a cheesecake, two batches of macarons and a loaf of pain d'épices (hopefully more on that to come later) I had already worked myself and my oven pretty hard for one weekend. But, knowing it was make them then, or wait until another weekend, I chose to go for it.


Once I was finished browning the butter, I knew this recipe would be great . Oh the wonderful, amazing smell of browned butter. Yes, these were going to be GOOD. I was a bit surprised at how much batter the recipe made (I ended up getting 4 pans worth) - I definitely wasn't going to have time to make it all that evening, so I hoped it would keep in the fridge so I could finish the rest the next day (it did).

Since the recipe calls for you to turn the oven temp down after several minutes, when I checked on the cookies (or petit cakes, if you will) had sizable 'bumps' growing and that sight really excited me. Almost as exciting as seeing feet appear on your macarons, though less difficult to achieve, I'm sure. I turned away for a moment and checked on them again, to admire the bumps and they had quickly grown even higher! These bumps were reaching for the sky I tell you. They were huge! And the smell of them baking, my god how incredible they smelled. I couldn't wait to try one.


I should've kept watching because the edges turned out a tad too brown with that first batch, but I watched them much closer the next day when I made the remaining batter and they came out perfectly.

The taste and texture of these madeleines are incredible! The outside has a bit of a crust to it and when you bite into it, you get this amazing orange and nutty flavor that makes you close your eyes and unknowingly let out a moan of approval. The best bite is the second one, when you get the whole bump in your mouth (I guess that is, assuming you don't have a big enough bite to get it in the first!) the way the spongy cake crumbles in your mouth along with the flavors - oohhh it's good. So, so good. Totally worth buying the pan just for this recipe alone.

If you really want to take these to the next level, you can drizzle them with a simple orange glaze - just mix some orange juice with powdered sugar until you get the consistency you want and drizzle away (or be bold and dip!). They certainly don't need it, though.


One more side note - these are best eaten the day they're made. You can keep them in an airtight container but they will lose any crispiness by the next day. They're still delicious, just not the same as when they're fresh.

You can find this awesome recipe here.

Enjoy!