So I brought my head back out of the clouds and found something simple. Rather than bake another chocolate cake (not that there's anything wrong with good 'ol chocolate!) I remembered a basic yellow cake recipe I'd seen on Smitten Kitchen not too long ago. Deb had declared it the "best birthday cake" so I knew this had to be a winner.
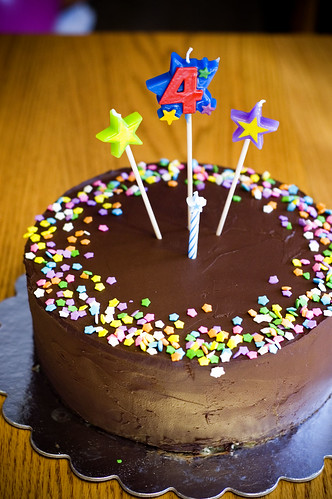
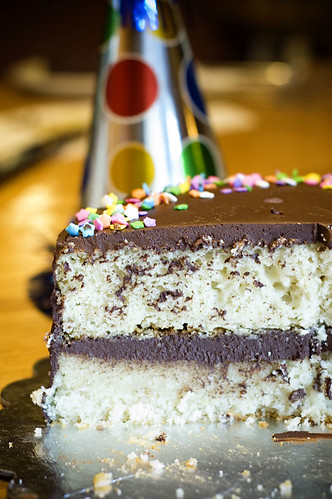
My son's only request was that it have stars all over it. Ah, he is *so* my son!
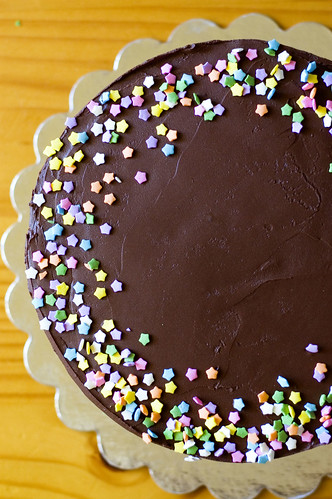
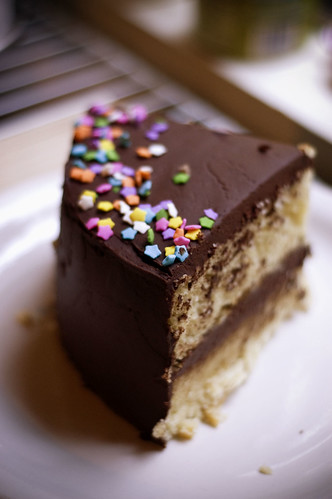
The cake turned out fabulously! It rose beautifully in the cake pans and had a nice very light yellow color. The taste and texture were superb! It stayed moist even in an airtight container on the counter 3 days later (same goes for in the fridge too!).
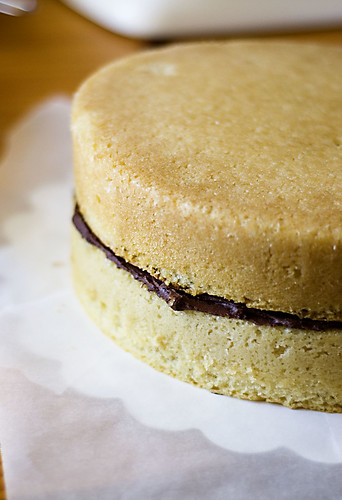
The frosting was equally as good and was a dream to work with. This stuff spreads so well and wants to be nice and smooth for you. It's super easy to make and has a very strong chocolate flavor, so be sure to use a good quality chocolate.
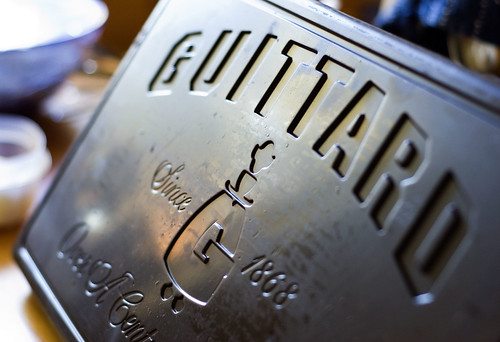
finally broke into this 10 pound bar of Guittard chocolate
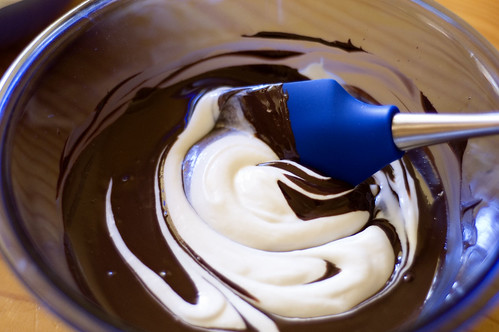
making the frosting - no mixer required

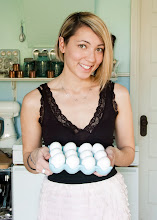
the birthday boy

sometimes he gets momentarily shy

Best Yellow Layer Cake
via Smitten Kitchen
Yield: Two 9-inch round, 2-inch tall cake layers
4 cups plus 2 tablespoons cake flour (not self-rising)
2 teaspoons baking powder
1 1/2 teaspoons baking soda
1 teaspoon salt
2 sticks (1 cup) unsalted butter, softened
2 cups sugar
2 teaspoons pure vanilla extract
4 large eggs, at room temperature
2 cups buttermilk, well-shaken
Preheat oven to 350°F. Butter and flour two 9-inch round cake pans (Alternately, you can use a cooking spray, either with just butter or butter and flour to speed this process up.)
Sift together flour, baking powder, baking soda, and salt in a medium bowl. In a large mixing bowl, beat butter and sugar in a large bowl with an electric mixer at medium speed until pale and fluffy (about 3-5 minutes), then beat in vanilla. Add eggs 1 at a time, beating well and scraping down the bowl after each addition. At low speed, beat in buttermilk until just combined (mixture will look curdled). Add flour mixture in three batches, mixing until each addition is just incorporated.
Spread batter evenly in cake pan, then rap pan on counter several times to eliminate air bubbles. Bake until golden and a wooden pick inserted in center of cake comes out clean, 35 to 40 minutes. Cool in pan on a rack 10 minutes, then run a knife around edge of pan. Invert onto rack and discard parchment, then cool completely, about 1 hour.
Chocolate Sour Cream Frostingvia Smitten Kitchen
Makes 5 cups of frosting, or enough to generously frost and fill a two layer 9-inch cake (with some left over)
15 ounces semisweet or bittersweet chocolate, chopped (use milk chocolate if you like it sweeter)
1 1/4 teaspoons instant espresso
2 1/4 cups sour cream, at room temperature (very important!)
1/4 to 1/2 cup light corn syrup
3/4 teaspoon vanilla extract
Combine the chocolate and espresso powder,in the top of a double-boiler or in a heatproof bowl over simmering water. Stir until the chocolate is melted. (Alternately, you can melt the chocolate in a microwave for 30 seconds, stirring well, and then heating in 15 second increments, stirring between each, until the chocolate is melted.) Remove from heat and let chocolate cool until tepid.
Whisk together the sour cream, 1/4 cup of the corn syrup and vanilla extract until combined. Add the tepid chocolate slowly and stir quickly until the mixture is uniform. Taste for sweetness, and if needed, add additional corn syrup in one tablespoon increments until desired level of sweetness is achieved.
Let cool in the refrigerator until the frosting is a spreadable consistency. This should not take more than 30 minutes. Should the frosting become too thick or stiff, just leave it out until it softens again.
Your cake is perfection and the birthday boy perfection plus:) Darling post!I love it!Party hats,sprinkles, little hands and smiles..what more could one want?:) Thanks!
ReplyDeleteAww what a lovely birthday cake!
ReplyDeleteClassic birthday cakes are always the best...looks like the birthday boy loved it!
Mmmm i love a simple cake recipe. Looks delicious, lucky birthday boy!
ReplyDeleteWow, this looks really good. I saw it posted on Deb's blog as well and have been eyeing it since. Now I've got another confirmation that it's this good. Thanks.
ReplyDeletethis looks delicious!!! does anybody know what does baking soda does for a cake batter? i usually leave it out of the ingredients, but i'm curious if results would be a lot different with it.
ReplyDeletethanxs!
Your photos are perfect even in low light! What camera do you use? The cake looks delicious. I should try that one out.
ReplyDeleteI saw this post at Smitten Kitchen too and have been wanting to make it. Thanks for reminding me--it looks fabulous. I love your pictures.
ReplyDeleteThis is so pretty. I particularly like how clean the frosting looks! And I love the simple but cute way you decorated it. It is very apt for a 4-year old!
ReplyDeleteThanks so much everyone for your wonderful compliments!
ReplyDelete@DE HARINA Y DE MAIZ - baking soda helps the cake rise properly, so I would imagine you will get much better results if you do not omit it.
@Memória - I have a Nikon D50 that is a discontinued model (it's a few years old). For these pictures I used a 50mm 1.8 lens, which is what I usually shoot with for most of my blog photos.
I absolutely love the finished look of this cake!
ReplyDelete:)
ButterYum
what kind of camera do you use???
ReplyDeletejust kidding, you TOTALLY already answered that :)
ReplyDeleteLovely photos! Do you think this cake (minus frosting) would freeze well? If so, at what temperature would you reheat it in the oven?
ReplyDelete@Live - this cake would freeze very well. Be sure to wrap it well in plastic wrap two or three times to prevent any freezer burn. To thaw, I would let it sit in the refrigerator overnight (while still wrapped in the plastic) so any moisture can be reabsorbed into the cake rather than evaporate and leave the cake dry. I wouldn't recommend thawing in the oven as that would likely dry the cake out.
ReplyDeleteHey there! Someone in my Myspace group shared this website with us so I came to give it a look. I'm definitely enjoying the information. best packaging, find,find, my box, best packaging, packaging tips, click, machine printing, best packaging I'm book-marking and will be tweeting this to my followers! Terrific blog and amazing design and style.
ReplyDelete