Tuesday, October 5, 2010

Espresso Buttermilk Ice Cream

buttermilk espresso ice cream - last of it
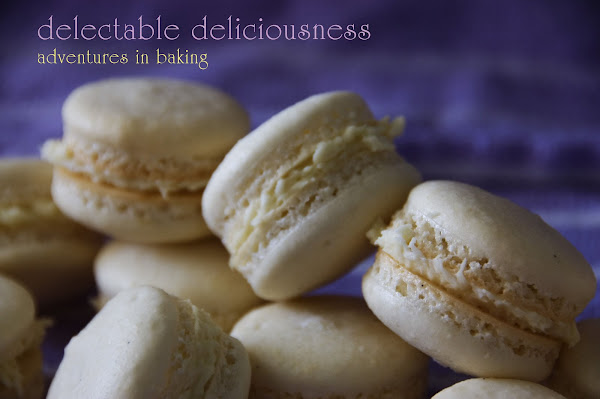
The last little bit.


That lonely, single, skimpy scoop was all that survived of this ice cream before I managed to snap a shot of it to share with you. I didn't intend for it to happen that way, it just sort of did. After the first bowl of this ice cream, I had already made up my mind: I would be making another batch of this ASAP. As luck would have it, life had other plans. Is that code for "Actually I'm just lazy"? Perhaps. Jury is still out on that one.

I can't really chalk it up to my own laziness, but due to many uncontrollable factors, it just didn't happen. And that, you see, is why there is only that one lowly little scoop I have to show you. This stuff is good. I mean, really good. It's unique. It's different. It's difficult to describe. It's probably not for every one, just thought I'd throw that in too.


buttermilk espresso ice cream - sucrebuttermilk espresso ice cream - espresso powder
sugar | espresso powder


The buttermilk gives the ice cream this truly unique tangy flavor. At first I thought it was too much. I was worried I wouldn't like it. But as you swirl it on your tongue, the tangy flavor gives way to the espresso flavor and then, towards the end, you're left with the slightest hint of....cheesecake. I know, it's odd. But like buttermilk, cheesecake can be tangy too. Once I was hit with that cheescake-y flavor I was hooked. I couldn't stop going for just one more spoonful. Then another. And another. And...I think you get my drift.

Despite vowing to make more, I didn't. The weather cooled down quite a bit (boo!) and my mind and hunger turned towards fall flavors and warmer treats. But I wasn't going to wait to share this incredible ice cream.


buttermilk espresso ice cream - eggsbuttermilk espresso ice cream - vanilla bean
half a dozen yolks | vanilla bean


My interest was piqued last year when I read Deb's post on Smitten Kitchen for buttermilk ice cream. I had filed the thought away in my (not so reliable) memory bank and promptly forgot all about it. Then, not long ago I was browsing around and came across a recipe for espresso buttermilk ice cream over at Elle's New England Kitchen. Espresso? Yes please! I decided to borrow the idea of adding espresso from Elle's recipe and use Deb's recipe as the base. I much prefer custard based ice cream recipes, which is why I went that route.The result: nothing short of fabulous!

Espresso Buttermilk Ice Cream
adapted from Smitten Kitchen and Elle's New England Kitchen

2 cups heavy cream
1 1/4 cup sugar
6 large egg yolks
2 cups buttermilk
half a vanilla bean (or 2 teaspoons vanilla extract)
1 tablespoon instant espresso powder
2-3 tablespoons Kahlua liquor (I used vanilla flavored)
pinch salt

In a saucepan, combine the cream and 1 cup of the sugar. Scrape out the vanilla seeds and add them to the cream, along with the vanilla bean pod. Bring to a simmer over medium heat. Remove from heat immediately and set aside.

In a large bowl, whisk the yolks and remaining 1/4 cup of sugar until pale yellow. Add a couple tablespoons of the warmed cream mixture to the yolks to temper them. Gradually add more warm cream into the yolks to warm them and then pour the yolks into the saucepan of warmed cream, whisking all the while.

Cook over low-medium heat until the mixture coats the back of a spoon. Strain the custard and mix in the buttermilk, espresso powder, Kahlua and salt (if using vanilla extract, add that now too).

Cool the mixture overnight and freeze according to your ice cream maker's directions.

Wednesday, August 4, 2010

Strawberry Ice Cream

strawberry ice cream - trio


Summertime weather around here has been seriously lacking. We had so little sunshine that I nearly forgot it was strawberry season around here! I'm no garden expert, but I figured strawberry plants needed sunshine to actually produce berries. Turns out they don't need much.

I soon found myself hunched over at a u-pick strawberry farm gathering as many as I could. This year's crop was certainly different from last year's - not as big or sweet and not as perfectly shaped, but delicious nevertheless. Brilliantly red inside and just begging to be eaten in some form or another.


strawberry ice cream - berries


Despite the cooler temperatures I'd already been making an abundance of ice cream, so naturally I was eager to use some of the freshly picked berries in yet another batch.

I feel I must confess that I've not always been a fan of strawberry ice cream. In fact, as a child I wouldn't eat it. Didn't like it in the least. Anytime someone brought out the neopolitan ice cream, (which was often - was that an 80's thing?) I was instantly put off and disappointed in that extra little third of ice cream that I would be deprived of, albeit self imposed! I wanted to like it, I really did. Beautifully pink as it is, I longed to have it happily on my spoon only there was that little thing about the taste....I just couldn't like it. I tried, but every time, there was that lonely, pretty pink third of ice cream, melting away into a puddle on my plate.

Well things have certainly changed. I'd like to thank Haagen Dazs for opening my eyes in my teenage years to the beauty that is strawberry ice cream. Oh, the beauty of it! Such luscious strawberry flavor, so creamy and smooth!


strawberry ice cream - pureestrawberry ice cream - ready to churn
strawberry puree | ready to churn


When I set out to find a recipe, I had only one desire for the final outcome: it had to be smooth; no seeds or fruit chunks. Right away I recalled a recipe I saw from Pioneer Woman for blackberry ice cream that was smooth and seed free. Ding ding! We had a winner!

The final product was a true thing of beauty. At first bite I thought, "Ohh, this is the best strawberry ice cream I've ever had!" then in the back of my mind I remembered that Haagen Dazs and thought, "Oh, well, maybe the second best I've ever had but certainly the BEST strawberry ice cream *I've* ever made!" (okay, so it's the only strawberry ice cream I've ever made, but who cares? Minor detail, I say).

You should try this. I promise, you'll be happy you did.

Strawberry Ice Cream
adapted from Pioneer Woman

1 pound strawberries
half a lemon, juiced
1/4 cup sugar

1 1/2 cups whole milk
1 cup sugar
5 large egg yolks

1 1/2 cups heavy cream

Hull your strawberries and add them with 1/4 cup sugar and the lemon juice to a medium saucepan. Cook over low heat for about 20-25 minutes. If you prefer seedless as I do, process your berries through a food mill. Set aside.

Warm the whole milk and 1 cup of sugar in a saucepan over low heat. The goal here is simply to warm the mixture, not boil. Once warmed, remove from heat and set aside.

Pour the heavy cream into a large bowl and place a strainer over it (you will be pouring your custard into this once it's finished cooking). Set aside.

In the bowl of a stand mixer, beat the egg yolks until pale yellow and slightly thick, approximately 3-4 minutes. Temper the yolks by adding about 1 1/2 cups of the warmed milk and sugar mixture. Pour the tempered yolks back into the saucepan of warmed milk mixture and return to the stove on medium low heat. Cook until thickened to a custardy appearance, or until mixture coats the back of a spoon. (Dip the backside of a spoon into the mixture then drag your finger through the middle - you want the trail left to be clean and not run back into the mark you just made.) Watch your mixture closely as it can easily turn from custardy to curdled before you know it.

Pour the custard into the heavy cream, being sure to strain it as you're pouring. Add the strawberry puree and mix well. Freeze according to your ice cream maker's instructions.

Enjoy!


strawberry ice cream - single

Thursday, July 22, 2010

Fancy little lemon-rhubarb mousse cakes

Lemon Rhubarb Mascarpone Mousse Cake - diagonal


Hello friends! Seems I've been absent for some time. So much has happened in the past few months that my head has finally stopped spinning! There were many times I wished and hoped for the energy to post (or even simply just the time to do so) but I was left without. Due to rather unfortunate circumstances for the owner of the house we rented, we were forced to move rather suddenly. While we were aware of a possible foreclosure on the home, we hoped for the best and at very least to finish out our lease. It wasn't to be, but luckily enough for us, we found an even better house just two blocks away (yes, literally) and everything fell into place for us quickly.

It wasn't long ago that I gave a tour of my small kitchen and it's compact charm. However, the lack of counter space had been a problem from day one, so imagine my squeals of glee upon moving into our new kitchen, er - I mean house: nearly 4 times as much counter space! And did I mention that counter space is granite? Oh yes, granite counter-tops! Stainless appliances! Drawers for all my tools! Space for my mixer and food processor with room to spare! It was a dream come true. I was overjoyed and could not wait to get in there and make something.

Then something happened. I totally burnt out. Moving has a way of doing that to you, especially when you just moved 6 months ago. I was drained. I just wanted to sit down and relax, yet I couldn't because of all the unpacking to do! It sounds so easy but for some reason, that part overwhelms me. So much so that I just wanted to not do a darn thing. The kitchen was calling but I wasn't answering. I had to get my groove back. In fact, I was surprised at how difficult it was for me to adjust to my new kitchen. I have so much more space that I don't quite know what to do with myself! I actually found myself in a bit of a slump; a tiny part of me missed my old kitchen - the light, the colors, my favorite kitchen pieces on display. None of it was the same and even though I thought I could easily transfer certain aspects of my old kitchen (such as the decor) I found it just wouldn't work in the new one. So it's been a bit of an adjustment on many levels. I am however, very grateful for it and have regained my footing by making some of my tried and true favorites in the new diggs, things that have already been blogged about, so not much new to show.


Lemon Rhubarb Mascarpone Mousse Cake - wavy


I do confess that I made these incredible mousse cakes just before the move. At the time I couldn't wait to post about them! Then life had other plans for a while. Looking at the pictures still has me just as excited as the day they were made. These were so much fun to make. The recipe comes from the always inspiring Helen from Tartelette. I had been browsing older entries on her blog and as soon as I saw these beauties I knew I had to make them. At the time I came across them it was still late winter and rhubarb wasn't anywhere to be found. Fast forward to early spring and I had a project on my hands!

These little mousse cakes might seem intimidating but they really are more time consuming than difficult to produce. They can, however, be made in steps over a couple of days which is always great if you don't have a whole afternoon to dedicate to making them. My favorite part was working with the tulip paste. You can make any design you wish and can really have a lot of fun with it!

The end result was unlike any dessert I'd ever had. The mousse was more lemony than I expected but so smooth and delicious. The rhubarb flavor was perfect: not too tart and not too sweet either. Overall these were satisfying and refreshing on both the eyes and palate.

A few notes on this recipe:
  • To get the lines with the tulip paste: there are two ways to go about it. You can pipe the tulip paste from a pastry bag to make any design you wish (using a very small tip) or you can evenly spread the tulip paste onto your lined baking sheet and drag a pastry comb through it. I tried both and liked both methods. Spreading and using the pastry comb is best for getting evenly spaced lines and with the pastry bag I was able to make some fun designs. 
  • I ended up with much more tulip paste and ribbon cake than needed. That being said, I'm hesitant to say you can halve the recipes for those - better to have too much than too little. I froze my extra (already baked and cut, ready to put into the forms) to use another time for an easy, impressive dessert. 
  • I used 3-inch diameter forms that are 2-inches tall (cut pvc pipe lined with parchment) and had enough mousse to make 3 completed cakes. If you want to make more than 3 servings of that size I would definitely recommend doubling the mousse recipe 
  • The tops were dusted with powdered sugar that had been colored with powdered food coloring, as Helen did in her original recipe. Do this just before serving as the moisture from the mousse will dissolve the powdered sugar (as you can see in the pictures this was already happening as I worked quick as I could - the darker magenta color on top is from the absorbed sugar)


Lemon Rhubarb Mascarpone Mousse Cake - trois


Lemon Rhubarb Mascarpone Mousse Cake
from Tartelette

for the tulip paste:
4 ounces unsalted butter, softened
4 ounces powdered sugar, sifted
1/2 cup egg whites, at room temperature (approximately 3-4)
4 ounces all purpose flour, sifted
1 1/2 tablespoons cocoa powder (dutch or natural, doesn't matter)

Cream the butter and powdered sugar together in a stand mixer fitted with the paddle attachment. Add egg whites and mix briefly to incorporate. Sift the flour and cocoa powder together; add to the butter mixture and mix until incorporated. Do not over mix. Use right away or store in the refrigerator, taking it out 30 minutes before you plan to use it.

Pour the batter into a piping bag fitted with a small plain tip. Line a baking sheet with parchment paper. Using a ruler set on top of the sheet as your guide, pipe lines with the tulip paste onto the parchment paper, or any shape you desire. You can also smooth a large amount of the paste on the paper and using a ruler set on the rim of the pan, use a decorator comb to drag on the batter to form lines.

Set the baking sheet in the freezer until the tulip paste is firm. Keep frozen until you are ready to pour the cake batter on top.

Lemon Rhubarb Mascarpone Mousse Cake -  - tulip paste

for the ribbon sheet cake:
4 ounces almond meal
3 ounces powdered sugar
1 ounce all purpose flour
4 eggs
1 egg yolk
3 egg whites
1 ounce granulated sugar
1 ounce melted unsalted butter

 In the bowl of a stand mixer fitted with the paddle attachment, beat the almonds, powdered sugar, flour and 2 eggs until combined. Scrape down the sides and add the remaining 2 eggs and the yolk until well combined. Set aside.

Whip the egg whites in a separate bowl until they appear foamy; add the granulated sugar in a steady stream and whip until you get a glossy meringue. Fold the meringue mixture into the egg/flour mixture. Stir in the melted butter and fold until all the ingredients are well incorporated but without deflating your meringue base.

Remove the baking sheet with the tulip paste from the freezer and pour the cake batter on top. Bake at 450F for about 6-8 minutes or until the sponge begins to brown. Remove from the oven, let cool a few minutes and invert your cake onto a piece of parchment paper. Peel off the parchment paper and let cool before using.

You can keep it wrapped in the refrigerator for up to a week or in the freezer for a month. Bring it back to room temperature before you fit it in the pastry rings.

Lemon Rhubarb Mascarpone Mousse Cake -  - squiggly lined cake

for the mousse:
1 egg, separated
2 tablespoons sugar
2 oz mascarpone cheese, at room temperature
75 ml. heavy cream
1 tsp. powdered gelatin (1/2 sheet) + 1 Tb water
zest and juice of one lemon
1 cup cooked rhubarb**

Sprinkle the gelatin over the water, stir and let sit to "bloom". In a large mixing bowl, whisk the mascarpone with the sugar; add 1 egg yolk and whisk until well incorporated. Heat the gelatin for about 10 seconds in the microwave and quickly whisk it in the mascarpone batter. Add the lemon juice and zest. Whip the egg white until stiff; fold into the mascarpone mixture. Add the cooked rhubarb. Whip the heavy cream to medium stiff peaks, and fold into the mascarpone.

**For the cooked rhubarb, Helen recommends 1 cup of chopped fruit to 1/3 cup sugar, cooked over low-medium heat until softened and mushy.

Lemon Rhubarb Mascarpone Mousse Cake -  - cooking rhubarbLemon Rhubarb Mascarpone Mousse Cake -  - cooked rhubarb

Assembly:

Line 6-8 pastry rings (depending on their size, mine are 3 inches wide and 2 inches tall) with parchment paper, cut 1.5 inches wide strips of cake and cut them to fit around the inside of your rings. Divide the mousse inside the rings and let set for at least 2 hours or overnight.

Enjoy!


Lemon Rhubarb Mascarpone Mousse Cake - plate and platter

Thursday, May 6, 2010

Shaker Lemon Pie and the Giveaway Winner!

shaker lemon pie - fork


Yes, yes, the lemon kick continues. (Winner announced at the end of this post) I've actually wanted to make this pie since I bought the Tartine cookbook a while back. Every single recipe in that book is something I wouldn't mind trying out, which for me, is a rarity. I even pondered dedicating myself to making each and every one, however, like many ideas I have, the thought was fleeting. Maybe in a few years' time I will have accomplished such an idea. Only time will tell.


shaker lemon pie - meyer


This pie is very straightforward. Make the pie crust and let it chill. Mix together the lemons and sugar and let them marinate. Roll out your pie dough and chill while you mix together the rest of the ingredients. Place your dough into a pie pan, pour in the prepared lemony goodness, top with another layer of dough, cut a few vents on top and into the oven it goes. Simple.

The hardest part is waiting for it to cool down so you can eat it!


shaker lemon pie - top


Shaker Lemon Pie
adapted from Tartine

2 medium lemons/ 1/2 pound or 225g
2 cups sugar/395g
4 large eggs
1/4 teaspoon salt

eggwash:
1 large egg yolk
1 tablespoon heavy cream

1 recipe for Flaky Tart Dough (2 rounds, each rolled to about 12-inches in diameter - recipe follows)

Slice the lemons as thin as you can. Remove the thick, stem ends and any seeds. Place into a non-reactive bowl (glass or stainless steel) and toss with the sugar. Cover and let sit at room temperature for 3 hours or up to overnight. If using Meyer lemons, you can skip letting them sit - their skins are tender enough as is.

Line a 10-inch tart pan (you really want a removable bottom here, trust me) with one round of your flaky tart dough. Set aside (refrigerate if it's really warm out).

In a small bowl, whisk the eggs and salt together. Add eggs to the lemon/sugar mixture and mix gently but thoroughly. Pour into prepared pie crust.

Make your egg wash simply by beating the egg yolk with a tablespoon of cream. Brush the rim of the dough with the egg wash and top with the second round of tart dough. Trim and crimp the edges. Brush the top of the pie with the remaining egg wash and sprinkle with sugar (hmm, it seems I completely left out this part myself! ha.) Chill for 30 minutes. While the pie is chilling, preheat your oven to 350 F.

Place your pie on a lined baking sheet and cut a few vents on top. Bake until golden brown on top and the filling is bubbling, about 40 minutes. Allow the pie to cool completely before slicing so that the filling has time to set properly. Serve with whipped cream.

Flaky Tart Dough
adapted from Tartine

1 teaspoon salt
2/3 cup very cold water
3 cups + 2 tablespoons flour (or 1 pound/455g by weight, which is the method I prefer)
1 cup + 5 tablespoons cold unsalted butter (I like to use frozen butter, seems to work better for me)

1. In a small bowl, add the salt to the water and keep in fridge until ready to use.

2. Using a food processor, add the flour to the work bowl. Cut butter into 1" chunks and scatter across the top of the flour. Pulse briefly until you have large crumbs. Add the cold water/salt mixture and pulse until the dough begins to come together in a ball but is not completely smooth. You should still see chunks of butter (about pea size). Alternately, you can use a pastry blender or forks to cut in the butter if you don't have a processor.

3. On a floured surface, divide the dough into two balls, shape into disks 1" thick (work the dough as little as possible). Wrap well in plastic wrap and chill for at least 2 hours or overnight.

Makes 2 9-10" pie crusts.

GIVEAWAY!

And now for the lucky winner of the Emile Henry giveaway!

Congratulations to Dor! Please contact me at jayme.michelle(at)yahoo(dot)com for details. :)

I hope you enjoy your Emile Henry pie dish as much as I do :)

Thanks so much to everyone for participating, I truly enjoyed reading all the amazing things you all have eaten recently.

Cheers!

Monday, April 26, 2010

Meyer Lemon Macarons

meyer lemon macarons - top view


****Just a quick note - there's still time to enter my Emile Henry giveaway! You have until Friday, April 30th to enter. Check out my previous post for details! CLICK HERE***

As I mentioned in my previous post, I had a lemon curd filled macaron not long ago that ignited an interest in me for all things lemon. Naturally, I felt another lemony macaron was in order. Enter these beauties. Not only did they satisfy my craving for (and new found love of) lemon, they also helped me appreciate that other type of lemon, that of the Meyer variety.

I had never heard of a Meyer lemon prior to last year when I became consumed by the food blog world (no pun intended ha!) where I saw them popping up all over the place once citrus season arrived. It seemed as if everyone raved about the flavor so I was excited when I found some. They're said to be sweeter than regular lemon - a cross between a lemon and mandarin orange. I excitedly made madelienes with them and when I first took a bite I was well, less than floored. Disappointed, actually. They tasted weird. I couldn't put my finger on it, but they didn't taste anything like what I expected. I wanted to like them, I really did. Yet with each bite I was met with a flavor I just didn't like. Did I use a bad one? Perhaps there was chemical residue left on the skin that turned my zest foul? I wasn't sure. Into the trash those madelienes went. After that, I decided they just weren't my thing and put the Meyer lemon out of my mind, happy to use the less pricier common lemon when the need arose.

Fast forward to a day in March when I decided to give the ol Meyer lemon another shot. I'm not sure why, but I felt I needed to give them another chance. I made these macarons and they turned out great! I still tasted a certain hint of  je ne sais quoi - it's lemon, but different. This time, the difference turned out to be good. For a little comparison, I made another batch, this time using a regular lemon. The difference was very distinguishable and, surprise surprise, I found that I preferred the Meyer lemon version!

Not long after I made these, I started an herb garden (fingers crossed - I'm terrible with plants!) with some frequently used herbs in our house hold: basil, Italian parsley, chives, oregano, sage. I also picked up some lemon thyme, which when I rubbed the leaves and took a sniff of I was surprised to find that to me, it smells just like how a Meyer lemon tastes (well, in baked goods anyway)! Intriguing. Is that just me? Maybe, but I'm happy to have found an appreciation for both Meyer lemons and now, oddly enough, lemon thyme.

Meyer Lemon Macarons
adapted from Helen's basic recpie

110 grams almond flour/meal
200 grams powdered sugar
90 grams aged egg whites (about 3)
30 grams granulated sugar
zest from 1 Meyer lemon
yellow food coloring (powdered or gel - see note below)

About 24 hours before you plan to make your macarons, set your egg whites out in a clean bowl to age. Keep them loosely covered, at room temperature with a paper towel to keep any stray dust out. This helps remove some of the moisture and helps you achieve a meringue that is more stable. (Note: If you end up not using your whites after 24 hours, cover them tightly and refrigerate for up to 5 days.)

Combine the almond flour, powdered sugar and zest. Get your hands in there and break up the clumps and lumps. You can sift if you like, but I prefer this more casual method. If you're using powdered food coloring, add it to the almond/sugar mixture. Set aside.

In a stand mixer, whisk your aged egg whites until they start to get foamy. Once you start to see enough foam to hide any remaining liquid egg white, sprinkle in your granulated sugar in a slow, steady sprinkle (or 'in the rain' as Helen says French recipes would state - love that description!). Continue to beat until you have a stiff, glossy meringue. This should take from 3-5 minutes in a stand mixer. You really want your whites stiff and cloud like.

Add your almond/powdered sugar mixture all at once. Gently stir to break down your whites a bit, then begin a careful fold. The key is to not over-beat the batter. The goal is to achieve an oozy mass that looks similar to a very thick pancake batter. It should be oozy, but not flowy - flowy means you've gone too far. Oozy is like thick magma - not the liquid hot, bright orange type of magma, the black on the outside, still red hot on the inside oozy type of magma that wouldn't worry you because you could easily out run it. Yeah, that type of magma.

Transfer your batter to a pastry bag fitted with a plain tip - #807 or #808 work best. Pipe your rounds onto silpat or parchment lined baking sheets. You can trace a circle on the underside of your parchment, or just pipe for a count of 4. No need to attempt a spiral shape (as I did when I made my very first few batches of macarons - makes for misshapen circles) instead, just pipe a nice single blob.

Once your shells are piped, smack your baking sheet a few times on the counter to pop any air bubbles you may have lurking. Don't be scared to really give the pan a good whack! Let them sit at room temperature to dry for 30 minutes to an hour - or when the tops are no longer tacky to the touch.

Bake at 315 F for 18 minutes, or until the shells are hard and cooked all the way through. It's important to know your oven and check on your shells near the end of baking time. I find that I have to bake my macarons at 325 for exactly 18 minutes in my oven - no more, no less. 18 minutes, every time, and at a higher temp than the recipe calls for. It may take a few batches to really know how to judge your timing.

Meyer Lemon Swiss Meringue Buttercream
makes approximately 1 1/2 cups

2 egg whites
1/2 cup sugar
1/4 teaspoon salt
1/8 teaspoon cream of tartar
2 sticks unsalted butter, at room temp cut into chunks
1/2 teaspoon vanilla extract
3 tablespoons lemon juice
zest of 1-2 lemons, or to taste

In a double boiler, combine the egg whites, sugar, salt and cream of tartar. Use a hand held mixer to beat until the mixture becomes too hot to comfortably touch - approximately 5 minutes or so. Remove from heat and transfer mixture to the bowl of a stand mixer fitted with a whisk. Continue to beat until you have stiff peaks. Add the butter a few pieces at a time, beating the mixture thoroughly. Lastly, beat in the vanilla, lemon juice and zest. Use at room temperature.

A note on using food coloring with macarons - powdered is best but can be difficult to find at your local market (though is easily found online with a quick google search). One thing that I've found to work is to take gel food coloring (this probably also works with liquid food coloring, but I haven't tried it. Gel coloring is easily found at craft stores) and add it to the 30 grams of granulated sugar. Mix them together very well until the sugar is evenly coated. Spread the sugar out into a thin layer on a piece of foil. Turn your oven on to a low heat, such as 200 F and once it's reached temperature, turn it off. Place your colored sugar into the oven but leave the door open. After a few minutes, the sugar will be dry. Take the back of a spoon and break it up back into small granules, as it will be clumped together. Be sure to color your sugar more intensely than you want your macaron shells as the color will lighten once the rest of the ingredients are added.


meyer lemon macarons

Tuesday, April 20, 2010

Lemon Sticky Rolls and a Giveaway! {CLOSED}


lemon sticky rolls


Yes yes, a giveaway! I am so very excited about this giveaway, but first, please let me blabber on about my new found love of lemony sweets, okay?

Let me just get to the point: I'm a chocolate girl. When it comes to desserts or sweets, I want chocolate. If given a selection, I will always pass on anything fruity in favor of anything chocolate. I like guarantees, and chocolate is guaranteed to please my palate. That's not to say I don't enjoy a strawberry shortcake, or warm apple crisp with a scoop of vanilla ice cream melting over the top of it. I love those too, but I don't crave them the same way I crave chocolate. So when it comes to fruit filled treats, I tend to overlook them.


lemon sticky rolls - dough, first rise


I had a shift in my thinking not too long ago when I had a lemon curd filled macaron. I was pleasantly surprised with each bite, realizing how tasty lemon truly is. I realized at that moment I needed to expand my horizons when it comes to citrus. It's different. Refreshing. And seriously delicious.


dough - before/after


Enter these lemon sticky rolls. When I first saw the recipe over at The Kitchn I thought it looked nice and all, but it didn't occur to me that it would be something I'd like to try. However, after working with some Meyer lemons one day and loving the results, I decided I had to give this one a go. Horizons were in need of broadening!


lemon sticky rolls - oozy filling


As I made the dough, the smell of the lemon was so tantalizing I knew I was onto something. And then I made the cream cheese glaze - wowza! It's amazing. Combined they form the most incredible treat so satisfying it forever changed my view on citrus sweets. I've been converted and there's no going back.


lemon sticky rolls - second rise


Just a few words on this recipe; the filling is runny, so just a heads up on that. I had a lot of it ooze out after I rolled the dough into a log. No biggie, but if I planned it a little better I might not have lost as much. These are best eaten warm from the oven and by next day they will be a bit dryer but are still tasty warmed up. You may want to double the glaze recipe - I did and didn't regret it! Half a batch fits perfectly in one pie dish (full recipe is below).


lemon sticky rolls - bite


Lemon Sticky Rolls
from The Kitchn
makes 12 large rolls

Lemon Roll Dough
1 envelope (0.25 ounces, or 2 1/2 teaspoons) yeast

3/4 cup milk, warmed to about 100°F or warm but not hot on your wrist
1/2 cup (1 stick) unsalted butter, very soft
1/4 cup white sugar
2 teaspoons vanilla extract
4 1/2 cups flour
1/2 teaspoon salt
1/2 teaspoon nutmeg
2 lemons, zested (I used Meyer lemons)
2 eggs

Sticky Lemon Filling
1 cup sugar
1/4 teaspoon freshly-ground nutmeg
1/2 teaspoon powdered ginger
2 lemons, zested and juiced
3 tablespoons unsalted butter, very soft

Lemon Cream Cheese Glaze
4 ounces cream cheese, softened
Juice of 1 lemon
1 cup powdered sugar
1 lemon, zested

In the bowl of a stand mixer, sprinkle the yeast over the warmed milk and let it sit for a couple minutes. With the mixer paddle, stir in the softened butter, sugar, vanilla, and one cup of the flour. Stir in the salt, nutmeg, and lemon zest. Stir in the eggs and enough of the remaining flour to make a soft yet sticky dough.

Switch to the dough hook and knead for about 5 minutes, or until the dough is elastic and pliable.
 (If you do not have a stand mixer, stir together the ingredients by hand, then turn the soft dough out onto a lightly floured counter top. Knead the dough by hand for 5 to 7 minutes, or until the dough is smooth, pliable, and stretchy.)

Spray the top of the dough with vegetable oil, and turn the dough over so it is coated in oil. Cover the bowl with plastic wrap and a towel and let the dough rise until nearly doubled - about an hour.

In a small bowl, mix the sugar with the nutmeg and ginger, then work in the lemon zest with the tips of your fingers until the sugar resembles wet, soft sand. Stir in the juice of 1 lemon. (Reserve the juice of the second lemon for the glaze.)

Lightly grease a 13x9 inch baking dish with baking spray or butter. On a floured surface pat the dough out into a large yet still thick rectangle — about 10x15 inches. Spread evenly with the softened butter, then pour and spread the lemon-sugar mixture over top. Roll the dough up tightly, starting from the top long end. Cut the long dough roll into 12 even rolls, and place them, cut side up, in the prepared baking dish.

Cover the rolls with a towel and let them rise for an hour or until puffy and nearly doubled. (You can also refrigerate the rolls at this point. Cover the pan tightly with plastic wrap, and place it in the refrigerator for up to 24 hours. When you are ready to bake the rolls, remove the pan from the fridge, and let them rise for an hour. If you do this, be prepared for a lot of the filling to have leaked into the bottom of your pan!)

Heat the oven to 350°F. Place the risen rolls in the oven and bake for 35 minutes or until a thermometer inserted into a center roll reads 190°F.

While the rolls are baking, prepare the glaze. In a small food processor (or with a mixer, or a sturdy whisk), whip the cream cheese until light and fluffy. Add the lemon juice and blend until well combined. Add the powdered sugar and blend until smooth and creamy.

When the rolls are done, smear them with the cream cheese glaze, and sprinkle the zest of 1 additional lemon over top to garnish. Serve while warm.


lemon sticky rolls - serving


And now for the best part! I am so happy to announce a giveaway sponsored by CSN Stores who have graciously offered to give one of my lucky readers a beautiful Emile Henry ceramic pie dish (like the one used in this post - stock photo is below)  in the color of their choice. CSN Stores has everything you might need to furnish your kitchen from counter stools and cutting boards to toasters and tea kettles. I have my eye on so many things in their cookware department!


To enter, all you have to do is leave a comment answering the following question:

What was the last amazing thing you ate?

Drawing closes at 11:11PM on Friday, April 30th.

BONUS: If you're on Twitter, tweet the following to increase your chances of winning:

Giveaway! Emile Henry ceramic pie dish from @violetcassis http://delectabledeliciousness.blogspot.com/ leave a comment and/or RT to enter

Only one comment per person and entry closes at 11:11PM April 30th.
EDIT: Offer open to US and Canadian residents.

Thursday, April 15, 2010

Smokey No-Knead Pizza

smokey pizza - serving


The other day, I got to thinking about comfort foods and what mine are. It seems that bloggers tend to often write about their own comfort foods and there is usually a lovely childhood story behind them. Unfortunately, I'm not quite so lucky in that regard. I didn't grow up with home cooked meals and family recipes passed down from grandma.

No, I grew up on McDonald's and anything microwaved.

smokey pizza - dough


Not very romantic, is it? Mom wasn't much of a cook. (Still isn't, but that's okay!)

I read about other people's comfort foods and they usually sound so dreamy and exotic - especially those who come from different countries (or whose parents did). I sometimes wish I could live through them the best, most comforting moments of their lives, just eating what is soothing to them. The memories and feelings a certain dish can bring back, I truly wish I had that.

smokey pizza - bare dough & sauced

I never believed I did until a recent epiphany. We were in desperate need for a hefty grocery store run, but it was late and I didn't feel like going. I figured I'd find something to throw together and make do until the next day. Being in a rather lazy mood, I decided to make a quick peanut butter and jelly sandwich, something I haven't made for myself in years (though I practically make them daily for my son who loves them above anything else).

smokey pizza - onions


As I ate my sandwich, my first thought was how good it was. Every bite made me feel like a little kid again; reminded me of that sliver of time that came after school and before my parents came home from work (yes, I was also a latch-key child) and the freedom of those couple of hours. The simplicity of having nothing to do other than your chores and perhaps a little bit of homework. The excitement of catching an hour or so of MTV (banned in our house - too risque in my parent's eyes) hoping to catch a video I'd already seen a hundred times. And that's when it hit me: this is my comfort food! I never would have thought of PB&J that way, but there it was. Each bite took me back to a simpler time and gave me a touch of the warm and fuzzies inside. And that is what comfort foods are all about. It's not gourmet, it's just simple and good. I like that.

smokey pizza - toppings


smokey pizza - ready to bake


This pizza I made recently is also just that: simple and good. It's not quite as simple as a peanut butter and jelly sandwich, but it's incredibly easy for a homemade pizza. You can make it after work and not feel like you had to put much effort into it.  The crust is a simple a no-knead recipe and only requires 2 1/2 hours total of rise time and turns out thin and crispy.

While you can always add whatever toppings you wish, I really wanted to showcase one of my favorite cheeses on this pizza. I used Beecher's Smoked Flagship which is amazing alone and even more incredible on a pizza. A little goes a long way and the smokiness is not overpowering. One bite and your eyes sort of roll back and you can't help but let out an enthusiastic, "Mmmmm!"


Smokey pizza - before/after basil


This recipe makes enough dough for two thin crust pizzas (sheet pan sized - 13 by 18 inch). I halved the recipe and it worked just fine. I prefer to use weight measurements but also included volumetric to the right if you don't have a scale.

One more note - no-knead bread is usually very wet and sticky. That is not the case with this recipe, in fact, it's the driest no-knead dough I've come across yet. You may have to really get in there and mix those last bits of dough into one ball - don't let that worry you! Sometimes hands are the best utensil :)

Basic Pizza Dough
from My Bread by Jim Lahey

500 grams bread flour (all purpose is fine) / 3 3/4 cups
10 grams instant or active dry yeast / 2 1/2 teaspoons
5 grams table salt / 3/4 teaspoon
3 grams sugar / 3/4 teaspoon
300 grams room temp. water (about 72 F) / 1 1/3 cups
extra virgin olive oil

In a medium bowl, mix the flour, yeast, salt and sugar. Add the water and using your hands, mix until well blended. At this point, it won't seem like typical no-knead dough, but much drier. Cover with a towel and let rise until more than double, or approximately 2 hours.

Remove dough from bowl and form into a rough ball. Divide into two halves and space them about 4-5 inches apart; cover both with a moistened towel (so it doesn't stick) for 30 minutes.

In the meantime, preheat your oven to 475-500 (if it goes that high, if not 475 is fine) and prepare your toppings. I prefer to keep it simple, so I used leftover spaghetti sauce, red onion, a roma tomato, Beecher's Smoked Flagship and a bit of manchego cheese that needed to be used.

Lightly oil your sheet pan. Take your dough ball and gently stretch it the length of your sheet pan and place it in the middle of the pan. Carefully stretch your dough until it covers the entire sheet pan. This dough is very easy to stretch and doesn't snap back on you. You may need to work it a bit to get it to cover fully, but it will.

Once your dough is stretched you can add your toppings. Bake for approximately 25 minutes or until the crust is golden. Remove and sprinkle with fresh basil.

Enjoy!

smokey pizza - close up