

I'm gonna cut right to the chase: I'm obsessed with this bread. OBSESSED. Obsessed I tell you! I'm so obsessed with it that I've said the word 'obsessed' so many times that it no longer sounds like a word.
I'm so in love with this bread that I even have the recipe memorized. That is no small feat, my friends because let me tell you - I have a horrible memory. Terrible. I instantly forget people's names upon being introduced to them. I couldn't tell you what I had for dinner two days ago. I lose my train of thought like you wouldn't believe.

after the first rise
What were we on about again?
Oh! Right. This amazing coconut chocolate bread I can't seem to get enough of!

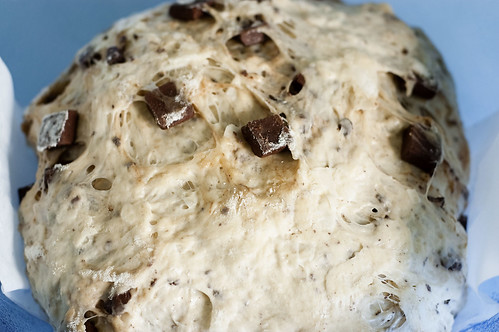
forming the boule
This wonderful bread is another variation of the infamous no-knead bread from Jim Lahey. I was given his new book My Bread as a gift and this was the second recipe I tested. This is also the recipe that seems to be preventing me from testing out any others in the book, as I can't seem to muster up the desire to try any others (yet). I've made this bread more times than I can recall (no surprise there) and I would guesstimate, at least once a week for the past month and a half (and sometimes multiple times a week!).
I've basically been living off of this stuff. I eat it for breakfast. As an after lunch snack. Perhaps a small slice before dinner. And definitely a thick slab for a late night treat. Admittedly, I start to feel a slight sense of panic when the loaf nears it's end. It's almost gone! I need to make more! I'm going to run out! GAH!
And by 'slight' I mean, 'immense'.
One thing I really love about this particular recipe is that it's not too sweet. I wouldn't call it a 'sweet bread' as the coconut doesn't add much sweetness and using bittersweet chocolate doesn't really either. It's a perfect blend of chocolate and coconut flavor with the amazingly chewey/crunchy texture of no-knead bread.
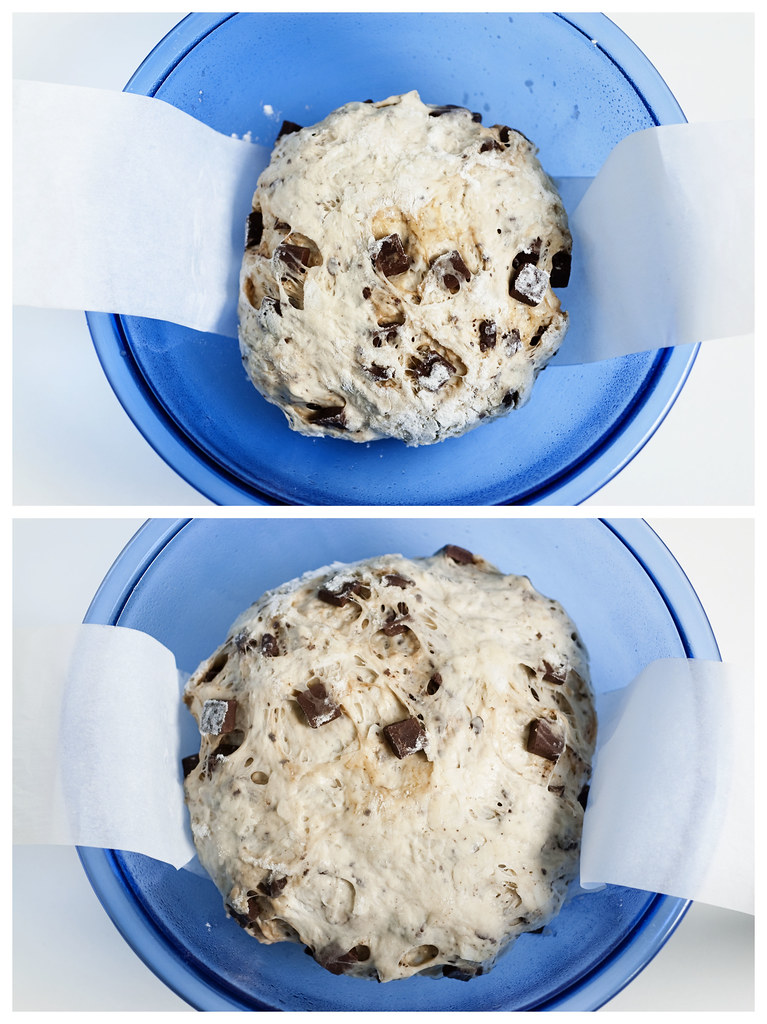
before and after the second rise
If you've never ventured into the world of no-knead bread, I highly encourage you to do so. It is truly a beautiful thing. Not to mention, quite yummy.
Just a few notes on this recipe...
- No-knead bread dough is usually very sticky and wet - this variation is less so. Don't be alarmed if it seems too 'dry'. Don't add more water! I tried this and ended up with a very flat loaf.
- The original recipe calls for half of the coconut to be added to the dough and the other half sprinkled over the top of the dough just before baking. I tried this and the coconut just ends up burnt during the last part of baking (after removing the lid to your baking vessel). Because of this I add all the coconut at the beginning, which is what probably causes it to be more dry than other no knead doughs, but it works out well
- I always strive to get my no-knead breads to be taller and more round, so I've taken to putting a strip of parchment under the dough ball during the final rise. This way I am able to lift the dough ball easily into my pre-heated dutch oven without mangling it. If you happen to run out of parchment, use a strip of well oiled foil and whatever you do, don't attempt to use a cut up paper Trader Joe's bag instead. Trust me on this.
Coconut Chocolate No-Knead Bread
adapted from My Bread by Jim Lahey
280 grams (2 cups plus 2 tablespoons) bread flour (all purpose works fine as well)
100 grams (2 cups, loosely packed) large flake unsweetened coconut
150 grams (1 cup) bittersweet chocolate chunks
4 grams (3/4 teaspoon) salt
1/4 teaspoon instant yeast
280 grams (1 1/4 cups) room temp water
1. Combine your ingredients in a large bowl and mix well. Cover and let sit for at least 12 hours and up to 18 (longer would probably be okay too).
2. Turn dough out onto a well floured surface and shape into a round boule. Lightly grease a large bowl and place a long strip of parchment a few inches wide in the bottom. Place dough ball on top of parchment strip. Cover with a towel and let rise for at least 1 hour and up to 2 hours.
3. 30 minutes before the end of the second rise, preheat your oven to 450 F with your dutch oven inside (any large baking vessel with a lid will work too).
4. Gently lift your dough using the parchment as handles and place into your pre-heated dutch oven and put the lid on. Bake for 30 minutes. Remove lid and bake for another 15-20, depending on how dark you prefer your crust.
Enjoy!


I believe I must make this bread:)
ReplyDeleteThis does look incredible! I'm not a huge fan of coconut but I would try this bread, most definitely.
ReplyDeleteIt looks great! Can't wait to try it.
ReplyDeleteThis looks amazing!
ReplyDeleteHi there! I am a new reader of your blog, and your description of this bread has made me extremely eager to try it out. However, I do have one question: Instead of instant yeast, will using active dry yeast do the trick? Do I have to make any modifications to the proofing time?
ReplyDeleteThanks!
Tammie
Tammie, from what I've read, you should substitute 1/3 teaspoon active dry yeast for the 1/4 teaspoon instant yeast with the same results. No modifications to the proofing necessary.
ReplyDeleteAlso, instant yeast is the same as those labelled Rapid Rise, Bread Machine, and Instant Active Dry yeast. Hope this helps. Let me know how it goes! :)
OMG. This looks/sounds AMAZING. I've never seen anything quite like it before. I definitely want to try it out! Thanks for posting your variations and successes/failures with it.
ReplyDeleteHey Jayme,
ReplyDeleteThanks for the advice. I substituted 1/2 tsp active dry yeast for the instant yeast in the end. And what can I say.. It was absolutely delicious! The only change I would make is to let the dough rise the second round in the actual baking pan itself, so that the the air in the dough wouldn't be affected by the transferring. How did you manage to transfer the dough without losing some of the size? Other than that, I think this is one of the best recipes I've ever attempted :)
I'm obsessed with No-Knead Bread too! This looks like a yummy variation. For Tammie and everybody else, you can't let the bread rise in the pot because it's important to preheat the pot along with the oven. I will try this and report!
ReplyDeleteThanks!
I printed out the recipe! I'm so on making this bread :) Thank youu!!
ReplyDeleteWow...that looks great. Reminds me of these pain au chocolate (they were actually pain, not croissants...) from Pearl Bakery in Portland - I was totally addicted. Wish I had the baking gene, I would try the recipe!
ReplyDeleteThat looks incredible and your pictures are inspiring!
ReplyDeleteI'm new to your blog but as I was scrolling through the pictures of this post my wife spied it over my shoulders and wouldn't stop pestering me about it until I promised to make it soon =)
This looks like a chocolate croissant all jumbled up into a ball of yummy goodness!!!!!!
ReplyDeleteFabulous Bread! Even better than a chocolate croissant, I kid you not. Now I'm thinking French Toast and Bread Pudding....
ReplyDeleteThis recipe sounds terrific! Is there any way you can post this recipe in terms of "cups" rather than "grams"?
ReplyDeleteHi there. I'm mildly obsessed with the cheese version of no-knead bread (and I'm always stunned that the cheese chunk never actually melt!). I'm planning to make this for a party this weekend, but was thinking of making it a sweet bread by using sweetened coconut and topping the warm loaf with a glaze. Do you think that would ruin the bread, taste-wise?
ReplyDelete@Shannon - I've added the cup measurments :)
ReplyDelete@Dimi - I think that sounds great! I would recommend using milk chocolate chips instead of bittersweet as I think it would go better with the sweetened coconut and glaze. Let me know how it turns out!
I just mixed this dough for the first time using sweetened, shredded coconut instead of unsweetened large-flake. Because of the extra moisture in the sweetened coconut, this resulted in a VERY wet, almost slippery dough (oops!). I added another 1/4 cup flour to dry it out, and now it's a matter of wait and see. I'll post back with the results!
ReplyDeleteThe results are in! Despite having an overly wet dough from start to finish, the final product turned out pretty well! Crisp crust, soft crumb, just sweet enough, and the coconut sprinkled on the outside before baking added a nice "toasted" texture. One observation/downside: baking time. When I pulled the lid off after 40 minutes @ 475 (as instructed by the book), I found my loaf was completely done! Chestnut color attained and no further baking necessary. Unfortunately, the bottom was totally burnt...not sure why this happened, as all of my other Jim Lahey breads need the additional "15 minutes with lid off" and never burn. Could it have been due to the sugar in the sweetened coconut? I'm open to suggestions as I'd like to try this recipe again.
ReplyDeleteJenn - I would suggest baking for 20-30 minutes with the lid on and then taking it off for another 15-20. I've never gone past 30 minutes with the lid on. When I make this, any chocolate or coconut on the bottom of the bread touching the dutch oven tends to get a bit burnt but not the whole bottom. The sugar in the sweetened coconut could possibly be the culprit, or a combo of that plus the extra long baking time.
ReplyDeleteI hope it works out better for you the next time! Let me know how it goes :)
I had issues with the bake time as well, see Jenn's comment. I caught the error somewhat early however the bottom was completely burned @ 33 min with the lid on and racks in the lower 1/3. I plan to make this again based upon others positive comments about the taste. Mine is still cooling, hopefully it's edible. I plan to back this again and would recommend placing the oven rack more in the center, bake @ 475 for 25-30 min with the lid on, then 10-15 min with the lid off.
ReplyDelete