Tuesday, April 20, 2010

Lemon Sticky Rolls and a Giveaway! {CLOSED}


lemon sticky rolls


Yes yes, a giveaway! I am so very excited about this giveaway, but first, please let me blabber on about my new found love of lemony sweets, okay?

Let me just get to the point: I'm a chocolate girl. When it comes to desserts or sweets, I want chocolate. If given a selection, I will always pass on anything fruity in favor of anything chocolate. I like guarantees, and chocolate is guaranteed to please my palate. That's not to say I don't enjoy a strawberry shortcake, or warm apple crisp with a scoop of vanilla ice cream melting over the top of it. I love those too, but I don't crave them the same way I crave chocolate. So when it comes to fruit filled treats, I tend to overlook them.
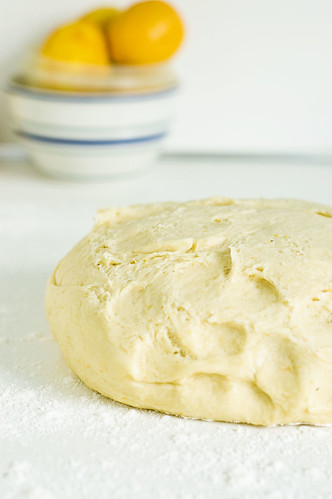


lemon sticky rolls - dough, first rise


I had a shift in my thinking not too long ago when I had a lemon curd filled macaron. I was pleasantly surprised with each bite, realizing how tasty lemon truly is. I realized at that moment I needed to expand my horizons when it comes to citrus. It's different. Refreshing. And seriously delicious.
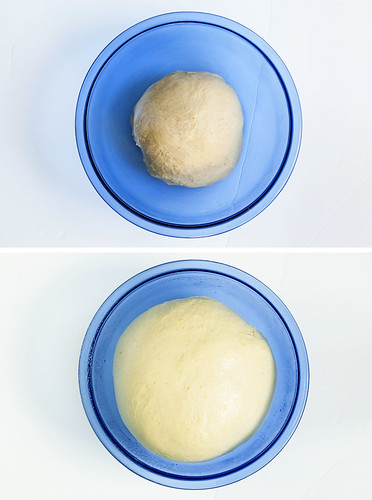


dough - before/after


Enter these lemon sticky rolls. When I first saw the recipe over at The Kitchn I thought it looked nice and all, but it didn't occur to me that it would be something I'd like to try. However, after working with some Meyer lemons one day and loving the results, I decided I had to give this one a go. Horizons were in need of broadening!
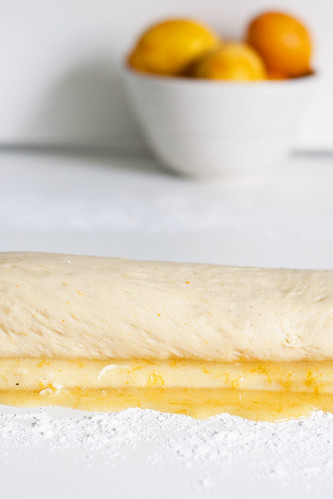


lemon sticky rolls - oozy filling


As I made the dough, the smell of the lemon was so tantalizing I knew I was onto something. And then I made the cream cheese glaze - wowza! It's amazing. Combined they form the most incredible treat so satisfying it forever changed my view on citrus sweets. I've been converted and there's no going back.
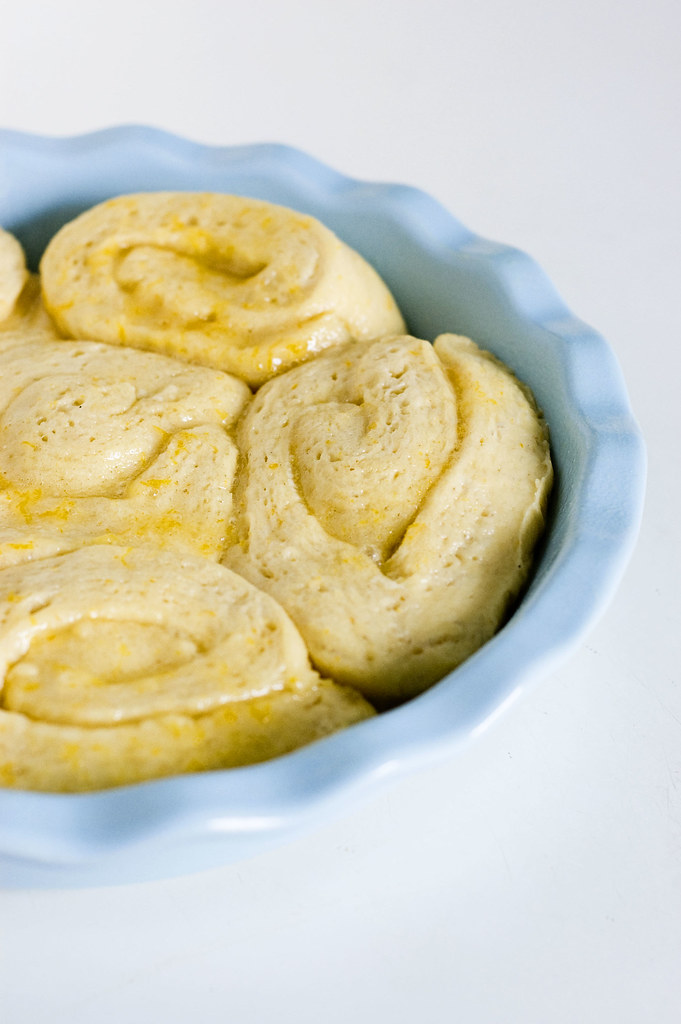


lemon sticky rolls - second rise


Just a few words on this recipe; the filling is runny, so just a heads up on that. I had a lot of it ooze out after I rolled the dough into a log. No biggie, but if I planned it a little better I might not have lost as much. These are best eaten warm from the oven and by next day they will be a bit dryer but are still tasty warmed up. You may want to double the glaze recipe - I did and didn't regret it! Half a batch fits perfectly in one pie dish (full recipe is below).
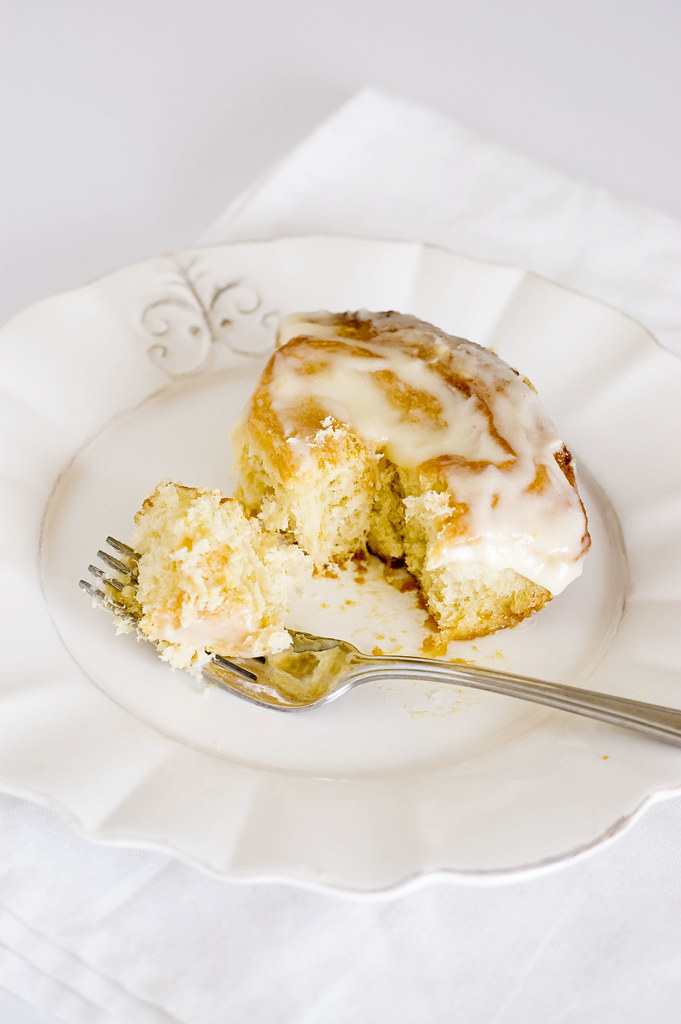


lemon sticky rolls - bite


Lemon Sticky Rolls
from The Kitchn
makes 12 large rolls

Lemon Roll Dough
1 envelope (0.25 ounces, or 2 1/2 teaspoons) yeast

3/4 cup milk, warmed to about 100°F or warm but not hot on your wrist
1/2 cup (1 stick) unsalted butter, very soft
1/4 cup white sugar
2 teaspoons vanilla extract
4 1/2 cups flour
1/2 teaspoon salt
1/2 teaspoon nutmeg
2 lemons, zested (I used Meyer lemons)
2 eggs

Sticky Lemon Filling
1 cup sugar
1/4 teaspoon freshly-ground nutmeg
1/2 teaspoon powdered ginger
2 lemons, zested and juiced
3 tablespoons unsalted butter, very soft

Lemon Cream Cheese Glaze
4 ounces cream cheese, softened
Juice of 1 lemon
1 cup powdered sugar
1 lemon, zested

In the bowl of a stand mixer, sprinkle the yeast over the warmed milk and let it sit for a couple minutes. With the mixer paddle, stir in the softened butter, sugar, vanilla, and one cup of the flour. Stir in the salt, nutmeg, and lemon zest. Stir in the eggs and enough of the remaining flour to make a soft yet sticky dough.

Switch to the dough hook and knead for about 5 minutes, or until the dough is elastic and pliable.
 (If you do not have a stand mixer, stir together the ingredients by hand, then turn the soft dough out onto a lightly floured counter top. Knead the dough by hand for 5 to 7 minutes, or until the dough is smooth, pliable, and stretchy.)

Spray the top of the dough with vegetable oil, and turn the dough over so it is coated in oil. Cover the bowl with plastic wrap and a towel and let the dough rise until nearly doubled - about an hour.

In a small bowl, mix the sugar with the nutmeg and ginger, then work in the lemon zest with the tips of your fingers until the sugar resembles wet, soft sand. Stir in the juice of 1 lemon. (Reserve the juice of the second lemon for the glaze.)

Lightly grease a 13x9 inch baking dish with baking spray or butter. On a floured surface pat the dough out into a large yet still thick rectangle — about 10x15 inches. Spread evenly with the softened butter, then pour and spread the lemon-sugar mixture over top. Roll the dough up tightly, starting from the top long end. Cut the long dough roll into 12 even rolls, and place them, cut side up, in the prepared baking dish.

Cover the rolls with a towel and let them rise for an hour or until puffy and nearly doubled. (You can also refrigerate the rolls at this point. Cover the pan tightly with plastic wrap, and place it in the refrigerator for up to 24 hours. When you are ready to bake the rolls, remove the pan from the fridge, and let them rise for an hour. If you do this, be prepared for a lot of the filling to have leaked into the bottom of your pan!)

Heat the oven to 350°F. Place the risen rolls in the oven and bake for 35 minutes or until a thermometer inserted into a center roll reads 190°F.

While the rolls are baking, prepare the glaze. In a small food processor (or with a mixer, or a sturdy whisk), whip the cream cheese until light and fluffy. Add the lemon juice and blend until well combined. Add the powdered sugar and blend until smooth and creamy.

When the rolls are done, smear them with the cream cheese glaze, and sprinkle the zest of 1 additional lemon over top to garnish. Serve while warm.
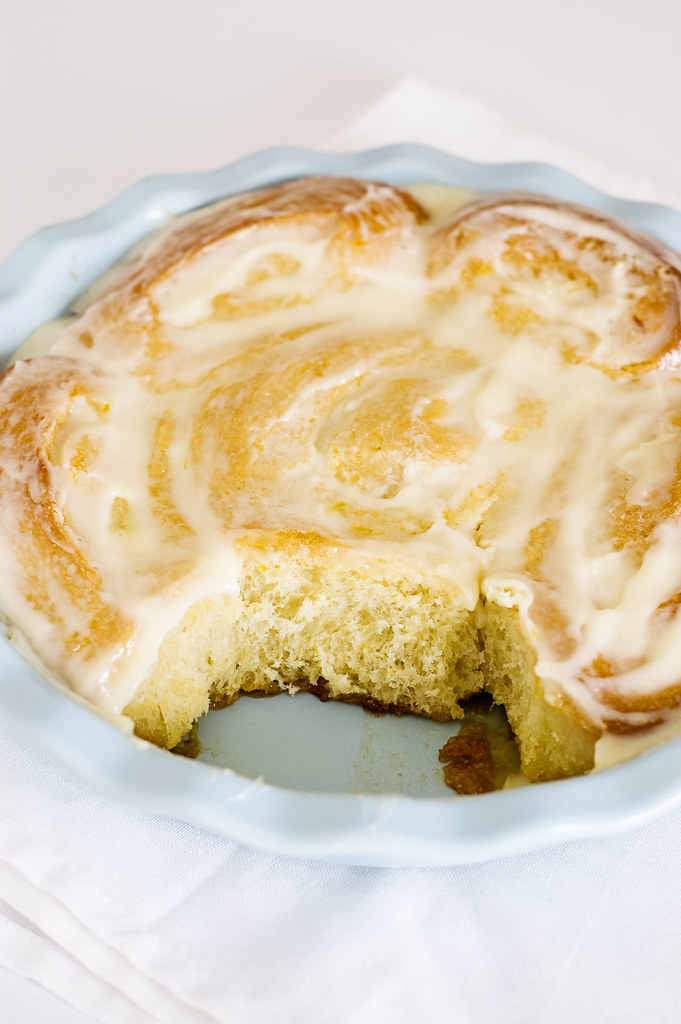


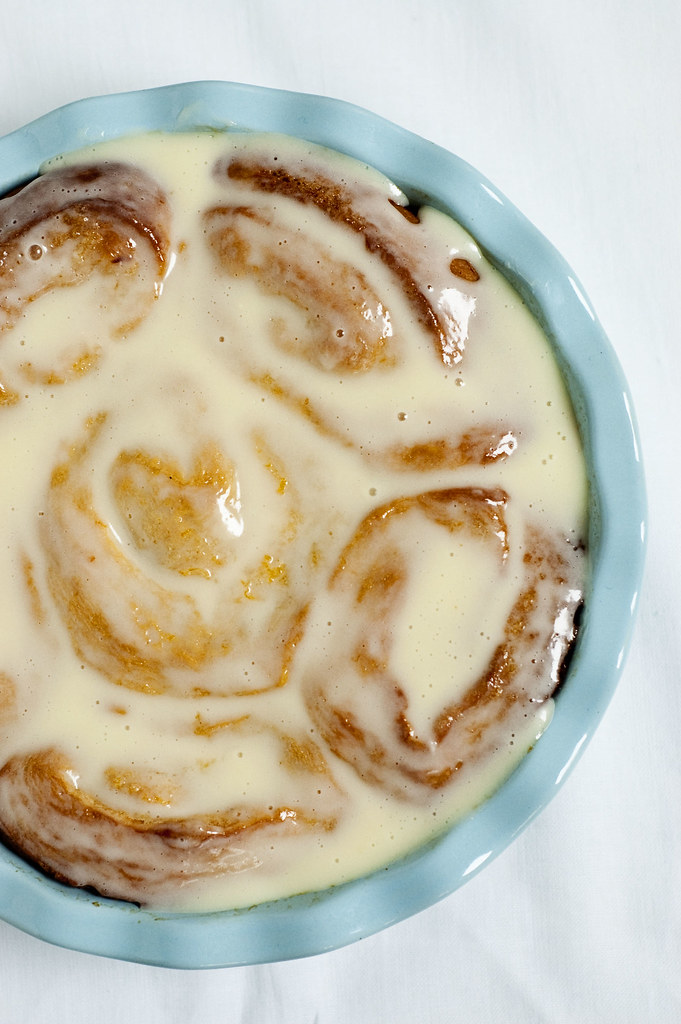
lemon sticky rolls - serving


And now for the best part! I am so happy to announce a giveaway sponsored by CSN Stores who have graciously offered to give one of my lucky readers a beautiful Emile Henry ceramic pie dish (like the one used in this post - stock photo is below)  in the color of their choice. CSN Stores has everything you might need to furnish your kitchen from counter stools and cutting boards to toasters and tea kettles. I have my eye on so many things in their cookware department!


To enter, all you have to do is leave a comment answering the following question:

What was the last amazing thing you ate?

Drawing closes at 11:11PM on Friday, April 30th.

BONUS: If you're on Twitter, tweet the following to increase your chances of winning:

Giveaway! Emile Henry ceramic pie dish from @violetcassis http://delectabledeliciousness.blogspot.com/ leave a comment and/or RT to enter

Only one comment per person and entry closes at 11:11PM April 30th.
EDIT: Offer open to US and Canadian residents.

Thursday, April 15, 2010

Smokey No-Knead Pizza

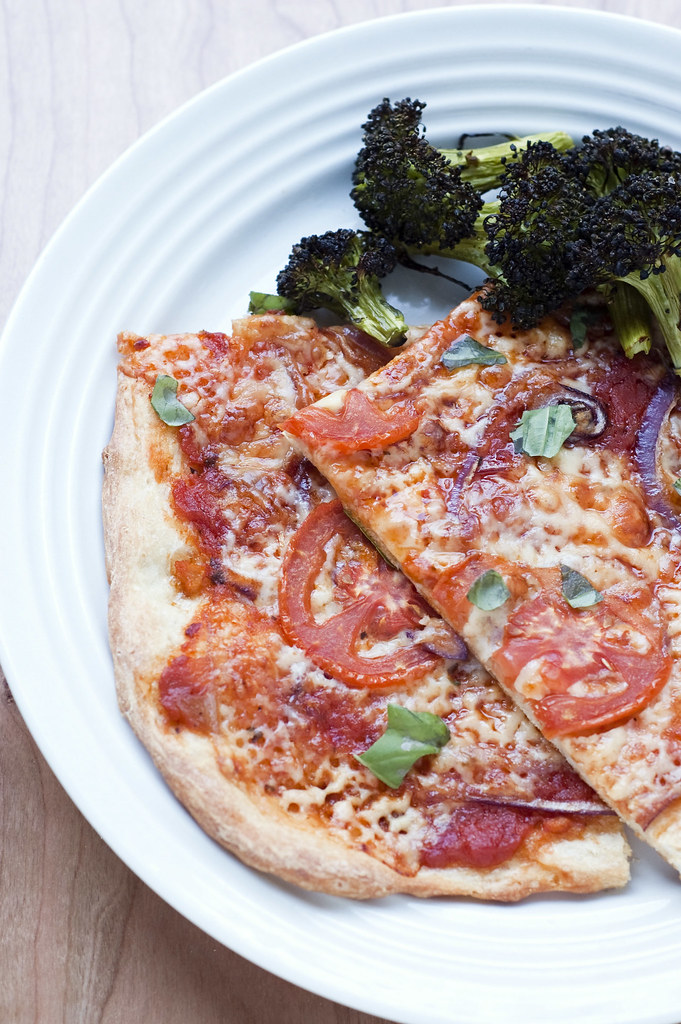
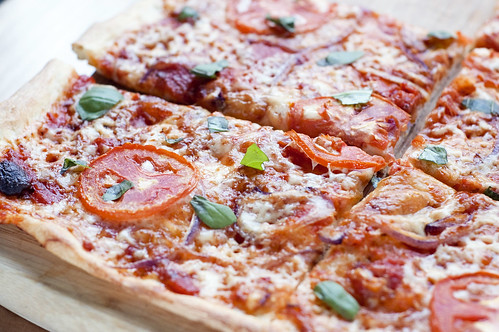
smokey pizza - serving


The other day, I got to thinking about comfort foods and what mine are. It seems that bloggers tend to often write about their own comfort foods and there is usually a lovely childhood story behind them. Unfortunately, I'm not quite so lucky in that regard. I didn't grow up with home cooked meals and family recipes passed down from grandma.

No, I grew up on McDonald's and anything microwaved.

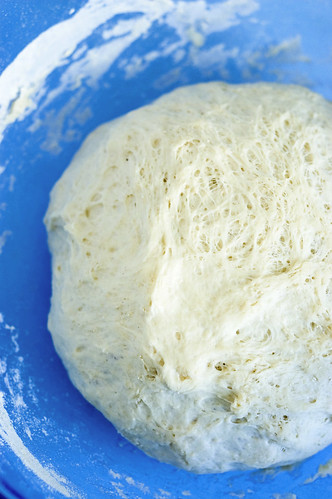
smokey pizza - dough


Not very romantic, is it? Mom wasn't much of a cook. (Still isn't, but that's okay!)

I read about other people's comfort foods and they usually sound so dreamy and exotic - especially those who come from different countries (or whose parents did). I sometimes wish I could live through them the best, most comforting moments of their lives, just eating what is soothing to them. The memories and feelings a certain dish can bring back, I truly wish I had that.

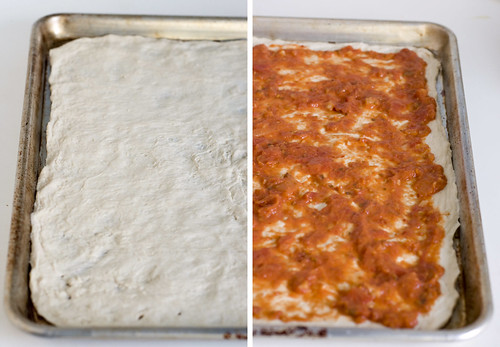
smokey pizza - bare dough & sauced

I never believed I did until a recent epiphany. We were in desperate need for a hefty grocery store run, but it was late and I didn't feel like going. I figured I'd find something to throw together and make do until the next day. Being in a rather lazy mood, I decided to make a quick peanut butter and jelly sandwich, something I haven't made for myself in years (though I practically make them daily for my son who loves them above anything else).

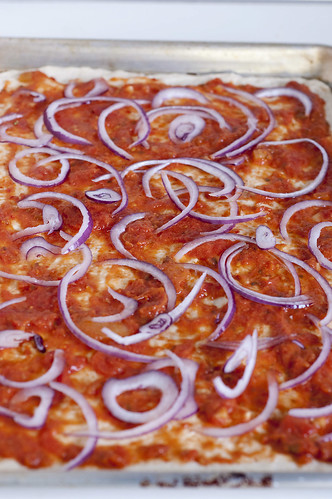
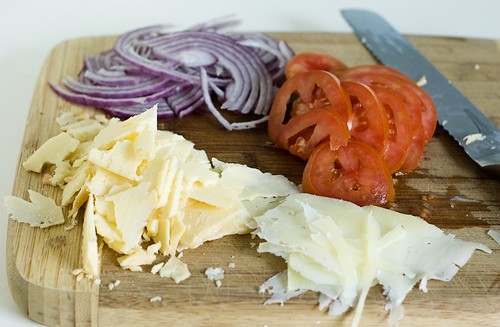
smokey pizza - onions


As I ate my sandwich, my first thought was how good it was. Every bite made me feel like a little kid again; reminded me of that sliver of time that came after school and before my parents came home from work (yes, I was also a latch-key child) and the freedom of those couple of hours. The simplicity of having nothing to do other than your chores and perhaps a little bit of homework. The excitement of catching an hour or so of MTV (banned in our house - too risque in my parent's eyes) hoping to catch a video I'd already seen a hundred times. And that's when it hit me: this is my comfort food! I never would have thought of PB&J that way, but there it was. Each bite took me back to a simpler time and gave me a touch of the warm and fuzzies inside. And that is what comfort foods are all about. It's not gourmet, it's just simple and good. I like that.

smokey pizza - toppings


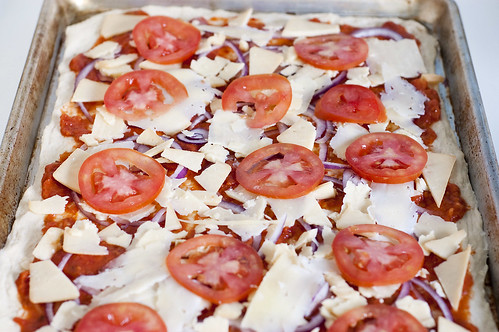
smokey pizza - ready to bake


This pizza I made recently is also just that: simple and good. It's not quite as simple as a peanut butter and jelly sandwich, but it's incredibly easy for a homemade pizza. You can make it after work and not feel like you had to put much effort into it.  The crust is a simple a no-knead recipe and only requires 2 1/2 hours total of rise time and turns out thin and crispy.

While you can always add whatever toppings you wish, I really wanted to showcase one of my favorite cheeses on this pizza. I used Beecher's Smoked Flagship which is amazing alone and even more incredible on a pizza. A little goes a long way and the smokiness is not overpowering. One bite and your eyes sort of roll back and you can't help but let out an enthusiastic, "Mmmmm!"


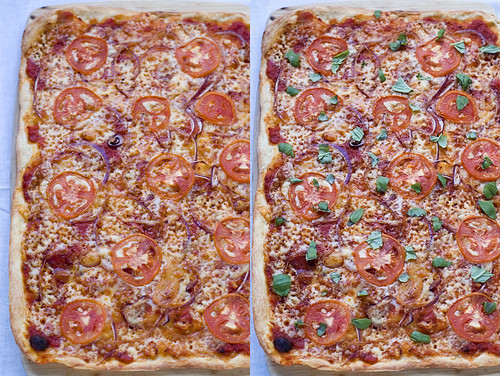
Smokey pizza - before/after basil


This recipe makes enough dough for two thin crust pizzas (sheet pan sized - 13 by 18 inch). I halved the recipe and it worked just fine. I prefer to use weight measurements but also included volumetric to the right if you don't have a scale.

One more note - no-knead bread is usually very wet and sticky. That is not the case with this recipe, in fact, it's the driest no-knead dough I've come across yet. You may have to really get in there and mix those last bits of dough into one ball - don't let that worry you! Sometimes hands are the best utensil :)

Basic Pizza Dough
from My Bread by Jim Lahey

500 grams bread flour (all purpose is fine) / 3 3/4 cups
10 grams instant or active dry yeast / 2 1/2 teaspoons
5 grams table salt / 3/4 teaspoon
3 grams sugar / 3/4 teaspoon
300 grams room temp. water (about 72 F) / 1 1/3 cups
extra virgin olive oil

In a medium bowl, mix the flour, yeast, salt and sugar. Add the water and using your hands, mix until well blended. At this point, it won't seem like typical no-knead dough, but much drier. Cover with a towel and let rise until more than double, or approximately 2 hours.

Remove dough from bowl and form into a rough ball. Divide into two halves and space them about 4-5 inches apart; cover both with a moistened towel (so it doesn't stick) for 30 minutes.

In the meantime, preheat your oven to 475-500 (if it goes that high, if not 475 is fine) and prepare your toppings. I prefer to keep it simple, so I used leftover spaghetti sauce, red onion, a roma tomato, Beecher's Smoked Flagship and a bit of manchego cheese that needed to be used.

Lightly oil your sheet pan. Take your dough ball and gently stretch it the length of your sheet pan and place it in the middle of the pan. Carefully stretch your dough until it covers the entire sheet pan. This dough is very easy to stretch and doesn't snap back on you. You may need to work it a bit to get it to cover fully, but it will.

Once your dough is stretched you can add your toppings. Bake for approximately 25 minutes or until the crust is golden. Remove and sprinkle with fresh basil.

Enjoy!

smokey pizza - close up

Saturday, April 3, 2010

Delectable Deliciousness Celebrates a Birthday


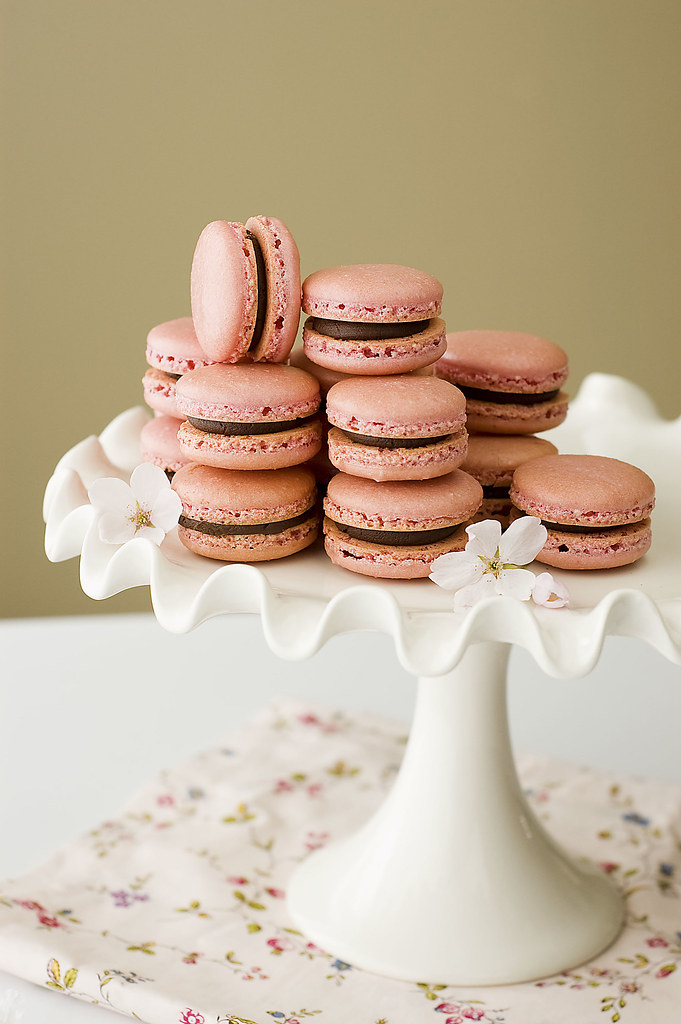
pink macarons - pedestal


Hard to believe it's already been a year since I began my blogging journey. So much has changed. In fact, so much so that it feels like two years ago, not just one.

I've enjoyed my slow but steady pace along the way this first year and while things have (really) slowed down over the past several months, I hope to pick it up in the future. I have a renewed excitement over many things and as most bloggers and food enthusiasts, a looong list of things I wish to try and experiment with.

One thing I'm truly focused on is improving my photography skills. There's always more to learn and I am very eager to do so! It truly makes me happy to look at some of the images I've captured and this blog certainly is a collection of a lot of them. I feel I can see a bit of growth in my images from last year at this time and that makes me happy.


pink macarons - short stack


I am still excited to read every new comment from you, my readers ("I have readers!" She says, excitedly) and appreciate every single one of them. I know things can be slow around here and I am so happy to know that there are people out there, taking time out of their day, their busy life, to stop by here to look around and sometimes even say a word or two of encouragement.

For that, I thank you.

And if I could, I'd bake you all a batch of these scrumptious macarons and send them to you to show you that I really mean it! :)

Happy 1st Birthday Delectable Deliciousness!


pink macarons - bite

Tuesday, March 30, 2010

Welcome to my kitchen

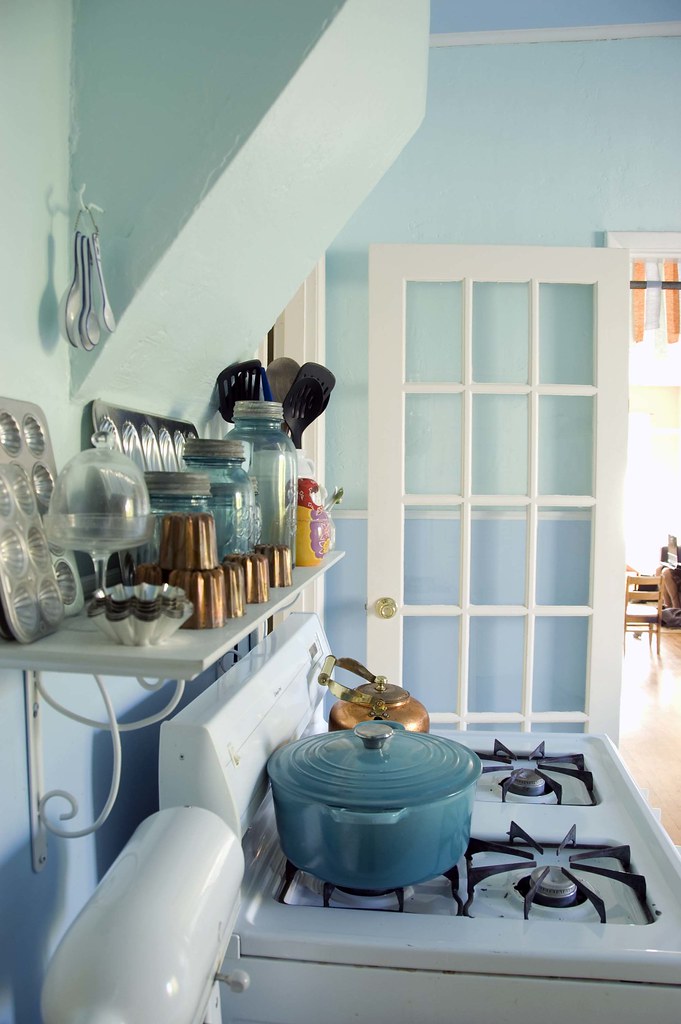
french door


So I've been holding out on posting this for nearly two weeks, partly due to laziness and/or busyness and also in part because I cringe a little when I think about showing my much less than gourmet kitchen. I have almost no counter space and because we live in an older home, the set up is rather odd.

However, I thought it might be strangely inspirational to other bloggers who may find themselves in a similar less-than-stellar kitchen situation. I know I love seeing other bloggers kitchens and, get this, even more when they are tiny and small and when you see them you think, 'Wow! They make everything they do IN THERE?'

Yep. Sometimes you just have to make it work and that is what I do every time I head into my kitchen.It has become my mantra, and so far, so good.

You can read my brief interview and take a tour here, over at Cafe Mom.

Monday, March 15, 2010

Make this bread.

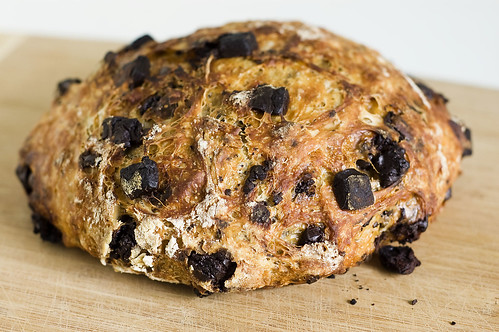
coconut chocolate bread


I'm gonna cut right to the chase: I'm obsessed with this bread. OBSESSED. Obsessed I tell you! I'm so obsessed with it that I've said the word 'obsessed' so many times that it no longer sounds like a word.

I'm so in love with this bread that I even have the recipe memorized. That is no small feat, my friends because let me tell you - I have a horrible memory. Terrible. I instantly forget people's names upon being introduced to them. I couldn't tell you what I had for dinner two days ago. I lose my train of thought like you wouldn't believe.


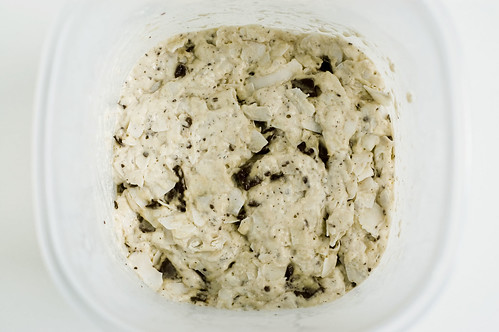
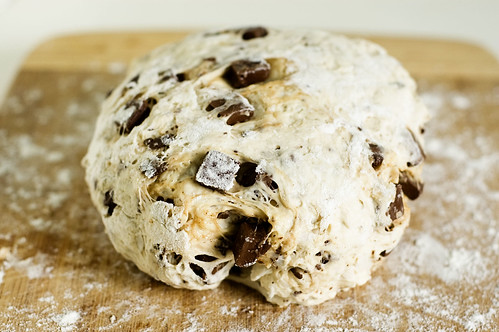
coconut chocolate bread - first rise
after the first rise


What were we on about again?

Oh! Right. This amazing coconut chocolate bread I can't seem to get enough of!


coconut chocolate bread - dough ball
forming the boule


This wonderful bread is another variation of the infamous no-knead bread from Jim Lahey. I was given his new book My Bread as a gift and this was the second recipe I tested. This is also the recipe that seems to be preventing me from testing out any others in the book, as I can't seem to muster up the desire to try any others (yet). I've made this bread more times than I can recall (no surprise there) and I would guesstimate, at least once a week for the past month and a half (and sometimes multiple times a week!).

I've basically been living off of this stuff. I eat it for breakfast. As an after lunch snack. Perhaps a small slice before dinner. And definitely a thick slab for a late night treat. Admittedly, I start to feel a slight sense of panic when the loaf nears it's end. It's almost gone! I need to make more! I'm going to run out! GAH!

And by 'slight' I mean, 'immense'.

One thing I really love about this particular recipe is that it's not too sweet. I wouldn't call it a 'sweet bread' as the coconut doesn't add much sweetness and using bittersweet chocolate doesn't really either. It's a perfect blend of chocolate and coconut flavor with the amazingly chewey/crunchy texture of no-knead bread.


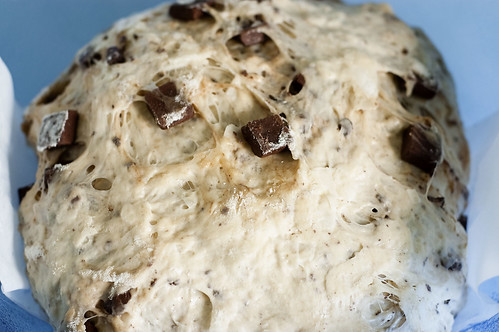
coconut chocolate bread - dough
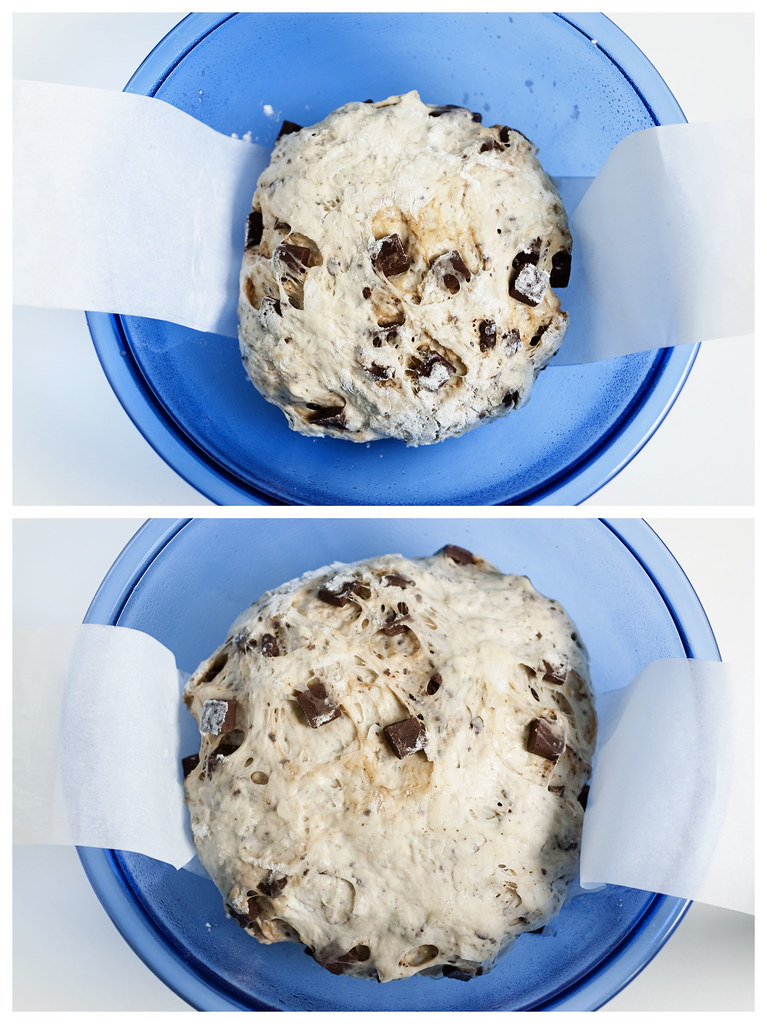
before and after the second rise


If you've never ventured into the world of no-knead bread, I highly encourage you to do so. It is truly a beautiful thing. Not to mention, quite yummy.

Just a few notes on this recipe...

  • No-knead bread dough is usually very sticky and wet - this variation is less so. Don't be alarmed if it seems too 'dry'. Don't add more water! I tried this and ended up with a very flat loaf.
  • The original recipe calls for half of the coconut to be added to the dough and the other half sprinkled over the top of the dough just before baking. I tried this and the coconut just ends up burnt during the last part of baking (after removing the lid to your baking vessel). Because of this I add all the coconut at the beginning, which is what probably causes it to be more dry than other no knead doughs, but it works out well
  • I always strive to get my no-knead breads to be taller and more round, so I've taken to putting a strip of parchment under the dough ball during the final rise. This way I am able to lift the dough ball easily into my pre-heated dutch oven without mangling it. If you happen to run out of parchment, use a strip of well oiled foil and whatever you do, don't attempt to use a cut up paper Trader Joe's bag instead. Trust me on this.

coconut chocolate bread - second rise


Coconut Chocolate No-Knead Bread
adapted from My Bread by Jim Lahey

280 grams (2 cups plus 2 tablespoons) bread flour (all purpose works fine as well)
100 grams (2 cups, loosely packed)  large flake unsweetened coconut
150 grams (1 cup) bittersweet chocolate chunks
4 grams (3/4 teaspoon) salt
1/4 teaspoon instant yeast
280 grams (1 1/4 cups) room temp water

1. Combine your ingredients in a large bowl and mix well. Cover and let sit for at least 12 hours and up to 18 (longer would probably be okay too).

2. Turn dough out onto a well floured surface and shape into a round boule. Lightly grease a large bowl and place a long strip of parchment a few inches wide in the bottom. Place dough ball on top of parchment strip. Cover with a towel and let rise for at least 1 hour and up to 2 hours.

3. 30 minutes before the end of the second rise, preheat your oven to 450 F with your dutch oven inside (any large baking vessel with a lid will work too).

4. Gently lift your dough using the parchment as handles and place into your pre-heated dutch oven and put the lid on. Bake for 30 minutes. Remove lid and bake for another 15-20, depending on how dark you prefer your crust.

Enjoy!


coconut chocolate bread - cut

Monday, February 1, 2010

Red Velvet Valentine's Macarons

red velvet macarons - plated


Oh macaron, how I love thee. Your crunchy outer shell with your chewy insides. The way you melt in the mouth and taste so dreamy with your various fillings. How cute you look in every color of the rainbow. ♥ swoon ♥

Will you be my valentine?

red velvet macarons - heart


These macarons make me smile. Inspired by a seasonal offering from Williams-Sonoma, they were an experiment of mine to attempt a red velvet macaron flavor and I am more than pleased with the result. Red velvet is very much an elusive flavor to describe. Technically, it's a buttermilk cake with a hint of cocoa and of course, the excessive red food coloring. The frosting also adds to the red velvet experience and can range anywhere from cream cheese frosting to vanilla sour cream or even a more modern twist - cinnamon buttercream.

red velvet macarons - piped shells


The latter is what I chose for these macarons, as I have used it previously on a red velvet cake for my mom's birthday that was met with rave reviews. The recipe comes from Baked, a well known bakery in Brooklyn that I had the pleasure of visiting last September. I tried a few of their cupcakes, including a red velvet, and while the cake was a bit on the dry side (perhaps it was due to my late in the day visit?) the frosting, oh the frosting! Every single one of them was divine. Not overly sweet at all and deliciously creamy. I'm usually the one to scrape off most frosting on baked goods piled high (as is usually the case with cupcakes) but theirs was so good I didn't dare. While a cinnamon buttercream may not be traditional for red velvet, I think it is an excellent modern twist on an old classic that has seen a resurgence.

red velvet macarons - pairing


To make a macaron red velvet, I simply modified a recipe I'd used before (employing the Italian meringue method) by adding a bit of cocoa powder. I was hoping to add a hint of cocoa flavor to the shells without turning them brown or chocolate flavored, however, there wasn't any hint of cocoa to be found. Had I added more I don't think the food coloring would have covered up the brown tint, though I may experiment more in the future with this.

All in all, I am still very pleased with the final result. I love the cinnamon buttercream with these but would think that a cream cheese frosting would go just as well with them.

red velvet macarons - boxed


**EDIT: I found a great new blog dedicated to these lovely little sweet treats called Mactweets and will be entering these in their Mac-a-Valentine round up. Check out!

A little note on this recipe - it makes A LOT. I easily filled 3 sheet pans worth. Also, please do yourself a favor and use two pastry bags for the batter. I made the mistake of only using one; I thought the 16-inch size I had would suffice but I ended up overflowing some batter while filling the pastry bag and then also had batter oozing out of the top and all over my hands. Lesson learned!

Red Velvet Valentine Macarons
adapted from Kitchen Musings

for the TPT (tant pour tant)
300 grams almond flour
300 grams confectioner's sugar
110 grams aged egg whites
1/2 teaspoon cocoa powder
red food coloring (I used a gel coloring)

Sift together the almond flour and confectioner's sugar. Mix in the egg whites to create the "mass" (mixture will be very thick). Add in your desired amount of red food coloring and mix well. Note: I didn't measure the amount I used, I just kept adding until I had a bright red color, keeping in mind that the color will be diffused a bit when the Italian meringue is added.

for the Italian meringue
300 grams granulated sugar
75 grams water
110 grams aged egg whites

Bring water and sugar to a boil until it reaches 239F on a candy thermometer. Start whipping your egg whites in a stand mixer to soft peaks once your sugar/water mixture reaches 239F. Continue boiling your sugar/water mixture while simultaneously whipping your egg whites.

Once the sugar/water mixture reaches 245F, remove from the stove and let bubbles settle. Turn your mixer to low-medium speed and slowly pour in your sugar syrup mixture while continuing to beat the whites. Beat until you get soft peaks that gently food over when you turn the whisk upside down.

Preheat your oven to 350F

Fold in 1/4 of your meringue mixture into the TPT "mass" to lighten the mixture. Gently fold in the remaining meringue until the mixture "flows like magma". Transfer to two pastry bags with a plain tip.

A note on how to pipe heart shaped shells: This takes some finesse. I started out with heart shapes drawn on parchment underneath my silpat which helped somewhat. This particular batter was more 'oozy' than the French meringue method I typically use, so it was a bit difficult to pipe them exactly into the shapes I traced. I ended up piping them freehand in a gentle 'V' shape that turned out well.

Allow for shells to dry at room temperature for at least 30 minutes (I almost always wait 1 hour) then bake at 350F for 12-20 minutes (depending on your oven).

Cinnamon Buttercream
adapted from Baked: New Frontiers in Baking

NOTE: I halved this recipe which made plenty for the amount of macarons I had. Double the amounts below if you want to make a full batch

3/4 cup sugar
1/8 cup flour
3/4 cup milk
1/8 cup heavy cream
3/4 cup (1 1/2 sticks) unsalted butter, soft but cool, cut into small pieces
1/2 teaspoon vanilla extract
1 teaspoon cinnamon

In a saucepan, whisk the sugar and flour together. Add the milk and cream and cook, whisking occasionally, until mixture comes to a boil and thickens. (recipe states "about 20 minutes" but my mixture thickened in under 10)

Transfer the mixture to the bowl of stand mixer and beat on high, using the paddle attachment, until cool. Reduce mixer speed to low and add the butter, piece by piece, beating until thoroughly incorporated. Add the vanilla and cinnamon. Increase speed to medium-high and beat until frosting is light and fluffy. If frosting is too soft, chill in the refrigerator and then beat again until proper consistency.

red velvet macarons

Wednesday, January 20, 2010

Decadent Chocolate Cake

intense deep chocolate cake - slice with milk

This is some serious chocolate cake. I'm talking, for REAL. I don't often make something I find myself thinking is "the best". As hard as I strive for perfection, I almost never achieve it. That's not to say I don't think the things I make turn out well, because they (usually) do. It's just that I always see the room for improvement. I'm often left thinking of substitutions or additions I could make to change the recipe I'm using to make it better.

This time, dear reader, that is not the case. This one is IT. Lean in and listen close because I don't say this often.

intense deep chocolate cake - top


This, right here, is - to date - the BEST chocolate cake I have ever made. BOOM. Period. The end. Dare I say, best CAKE I've ever made! Oh yeah, we're not just talking chocolate cake here, we're crossing borders! We're taking down yellow cake, white cake, red velvet and any other cake that has ever crossed my path! This one is it and I have to say, I'm quite proud of myself about it. Did you just hear that horn? Yeah, I'm tootin' my own over here because yes, I have really out done myself this time. A personal best, for sure (and trust me, it takes a lot for me to even think that, let alone proclaim it!).

It's not just this particular cake recipe that makes it the best (this one is equally as delicious but was more cake than I needed), but rather all the components put together. In total, there is over a pound of chocolate in this cake. And it is good. So good. So good I felt the need to italicize and bold the fact that it is so good. This is serious people! I think I mentioned that? Wait - yes, I did. Whew. Just wanted to be sure.

I promise you, if you make this cake, it'll make you proud. People will rave. The skies will part and a rainbow will shine down on you and glitter will fall from the sky.

intense deep chocolate cake - layers


The cake itself is incredibly moist (even days later if wrapped well and stored in the fridge) and despite all the chocolate components, it's not at all overly sweet. It has an intense, deep chocolate flavor that is truly decadent.

Now, I must forewarn you - a cake of this caliber does take some time to produce. None of it is very technical but give yourself an afternoon to put it all together. You can most certainly make it a day ahead, just be sure to store it in an airtight container of some sort (or wrap it very well in plastic wrap) and keep it in the fridge.

intense deep chocolate cake


Beatty's Chocolate Cake
from Barefoot Contessa at Home (Ina Garden is my hero. She never fails me.)

1 3/4 cups all purpose flour
2 cups sugar
3/4 cups cocoa powder (I used Dutch processed)
2 teaspoons baking soda
1 teaspoon baking powder
1 teaspoon kosher salt
1 cup buttermilk
1/2 cup vegetable oil
2 extra large eggs, room temperature (I used 2 large eggs and about half of another egg)
1 teaspoon pure vanilla extract
1 cup freshly brewed hot coffee

1. Preheat oven to 350 F. Butter and flour two 8 or 9 inch round cake pans.

2. Sift together the flour, sugar, cocoa powder, baking soda, baking powder and salt and set aside.

3. In the bowl of an electric mixer fitted with the paddle attachment, combine the buttermilk, oil, eggs and vanilla. With the mixer on low, slowly add the dry ingredients to the wet to combine. Slowly add the hot coffee just until combined.

4. Pour batter into the prepared pans and bake for 35-40 minutes or until a cake tester comes out clean.

intense deep chocolate cake - mousse

For the filling:

Chocolate Mousse
adapted from Cooks Illustrated, via Orangette

*Note - you can probably halve this recipe depending on how much filling you like. I prefer a very thick layer of filling and had just enough left over for some simple decoration for the finished cake, plus a couple extra spoonfuls for a taste test ;)

8 oz. bittersweet chocolate, finely chopped
2 tablespoons Dutch processed cocoa powder
1 teaspoon instant espresso powder
5 tablespoons water
1 tablespoon whiskey
2 large eggs, separated
1 tablespoon sugar, divided into 1 1/2 teaspoons each
1/8 teaspoon salt
1 cup plus 2 tablespoons cold heavy cream

1. Combine chocolate, cocoa powder, espresso powder, water and whiskey in a medium heat proof bowl. Heat over a double boiler, stirring frequently until chocolate is melted and the mixture is smooth. Remove from heat and set aside.

2. In another medium bowl, combine the egg yolks, 1 1/2 teaspoons sugar and salt. Whisk until mixture lightens and thickens slightly (about 30 seconds if using an electric mixer). Pour the melted chocolate into the egg mixture and whisk until combined. Set aside until mixture cools to just warmer than room temperature.

3. In the bowl of a stand mixer fitted with the whisk, beat egg whites on medium speed until frothy; add remaining 1 1/2 teaspoons sugar and increase speed to medium-high and beat until soft peaks form. Stir about 1/4 of the egg whites into the chocolate mixture to lighten. Gently fold in remaining egg whites until only a few white streaks remain.

4. Using your now empty mixer bowl (no need to wash it), whip heavy cream until soft peaks form. Fold the whipped cream into the chocolate/egg white mixture until no white streaks remain. Cover and refrigerate until firm for at least 2 hours (or up to 24).

intense deep chocolate cake - ganache


For the frosting:

Simple Ganache
adapted from various sources of ganache ratios

5 oz. milk chocolate, finely chopped
4 oz. bittersweet chocolate, finely chopped
1 teaspoon instant espresso powder
6 oz. heavy cream

1. Place chopped chocolate and espresso powder in a medium bowl. Heat heavy cream in a saucepan over medium heat until just to a boil. Pour over chocolate and let sit, covered, for about 5 minutes.

2. Whisk cream and chocolate mixture until smooth. Cool until ganache is of spreadable consistency.

intense deep chocolate cake - inside