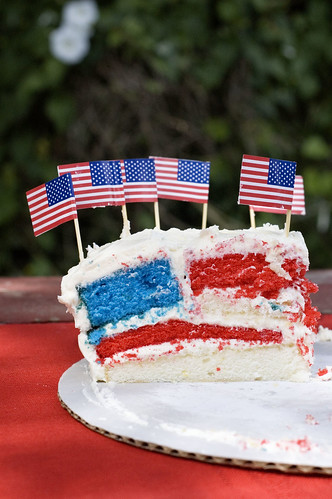
First and foremost, I have to say I cannot take any credit for the creative design that went into this cake. None of it. I saw this cake on 17 and baking and was, as I'm sure many who also saw it, instantly delighted just at the sight of it. This was a creative work collaborated by Elissa and her father (whom she says came up with the idea).
After I was done being in awe of such a beautiful cake and wonderful idea, I knew I had to make it for the 4th. I hadn't yet decided on what to make and her post popped up at the perfect time. Wheels were already turning and very quickly I knew what frosting I was going to use and what cake recipe I wanted to try out.
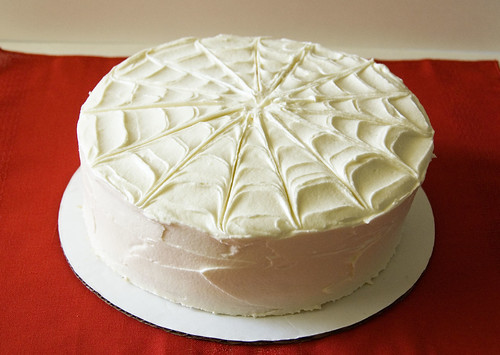
pretty, but it needed something else...

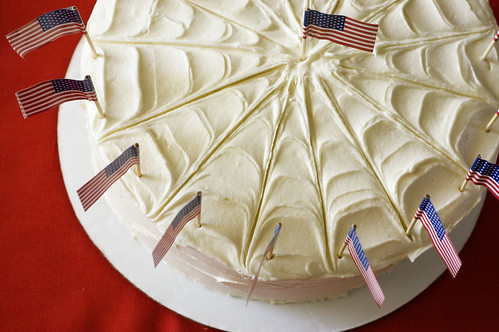
ah! yes! now that's festive!
I have seen Dorie Greenspan's Perfect Party Cake all over the blogosphere and while admittedly, never really had a desire to make it (I much prefer a chocolate cake over any other) I thought it would work well for this project. All the reviews I've ever read about it were raving. With the word "perfect" in the title, it's gotta be good, right? YES. It's true.
This cake received the most rave reviews over anything I've ever made! Part of it was the wow factor of the flag pattern inside, but the flavor of this cake is absolutely scrumptious. It's a very light lemon flavored cake and it's just perfectly moist and paired wonderfully with the frosting I used. Everyone wanted to try a piece (which almost never happens - usually there's a few "I ate too much" or "I'm on a diet" excuses) and, AND what really made my day - my children's great grandmother, who is an amazing baker and cook, said it was the best cake she's ever had! Now, I was just smitten that she even wanted to TRY a piece (she never eats other people's baked goods I've noticed - it's not something spoken, but she usually has an excuse when dessert time rolls around) but that she really liked it, well, I felt pretty darn great after that. :)

To start, you need 3 layers of cake (red, white and blue, obviously). Dorie's recipe makes a 2 layer 9-inch round cake, so I made one and a half batches to get my 3 layers. Instead of making all the cake batter at once, I made the full batch first and once that was done baking, made the half batch. This worked out really well for me as I only have two 9-inch round cake pans and can only fit those two in my oven at a time.
One good thing about Dorie's recipe is that the batter is very well mixed - this helps when having to add food coloring to your batter. There was no danger of overmixing and having a deflated cake.
Perfect Party Cake
from Dorie Greenspan's "Baking: From My Home to Yours"
2 1/4 cup cake flour
1 tablespoon baking powder
1/2 teaspoon salt
1 1/4 cups whole milk or buttermilk (I used buttermilk)
4 large egg whites
1 1/2 cups sugar
2 teaspoons grated lemon zest
1 stick (8 tablespoons) unsalted butter, room temperature
1/2 teaspoon pure lemon extract
1. Preheat oven to 350°F. Spray two 9-inch round cake pans with non stick spray. Optional - line the bottoms with a round of parchment. If using, also spray the parchment with non stick spray.
2. Sift together flour, baking powder and salt. Set aside.
3. Whisk together the milk and egg whites in a medium bowl. Set aside.
4. In the bowl of your electric mixer, combine the sugar and lemon zest and rub the lemon zest into the sugar with your fingers until well incorporated. The mixture will become moist and very fragrant.
5. Add the butter to the sugar/zest mixture and, using the paddle attachment, beat on medium speed for a full 3 minutes. Add the lemon extract and 1/3 of the flour mixture; add 1/2 of the milk/egg white mixture and continue to beat at medium speed, then add half of the remaining flour mixture, then the rest of the milk/eggs and finish with the remaining flour. Once all ingredients are combined, beat the batter for a good 2 minutes to ensure it is thoroughly mixed and well areated.
6. Pour into prepared pans and bake for approximately 30 minutes, or until a toothpick inserted into the center comes out clean.
White Chocolate Frosting
adapted from foodnetwork
*note: I doubled this recipe to frost the flag cake and had some left over
5 ounces good quality white chocolate, chopped fine
2 sticks (1 cup) unsalted butter, room temperature
3 cups powdered sugar, sifted
pinch salt
1/2 teaspoon vanilla extract
1/4 cup sour cream
1. Melt white chocolate over a double boiler or in microwave. Set aside to cool.
2. In the bowl of an electric mixer fitted with the paddle attachment, beat the butter until light a fluffly. Slowly add the powdered sugar until well combined.
3. Add the salt, vanilla extract and sour cream and beat until very smooth.
4. Add the melted white chocolate and beat just until combined.
Now for the fun part!
As for how to assemble this cake, Elissa did a great job of explaining it on her blog. I'm going to break it down for you:
1. You'll have 3 cakes - red, white and blue. Using a serrated knife or cake leveler (best bet to getting even layers!) cut both the white and the red cakes horizontally so that you now have two layers of each. Set aside one layer of both the red and the white - these will be the two bottom stripes of your flag.
2. Stack the remaining red and white layers and place the blue cake on top.
3. Place a bowl or any circular guide (approximately 3 or 4 inches in diameter depending on how big you want your blue square to be in each slice) in the center of the stacked cakes. Cut around your guide through all three cakes.
4. Discard (read: eat) the inner circle of blue and the outter rings of the red and white. You will then have an outter ring of blue cake along with two small, round red and white layers. Looks like this:
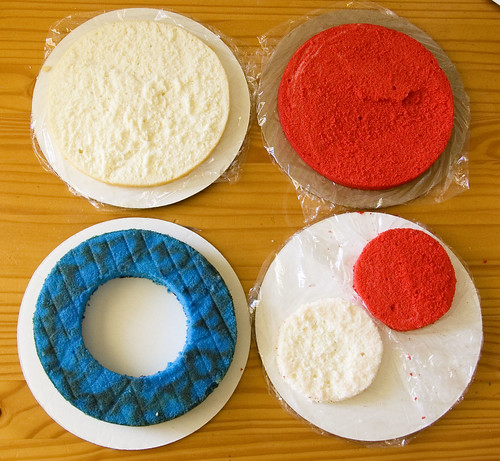
5. Frost your bottom two layers of cake (red and white) then place your blue ring on top of that; spread a thin layer of frosting on the inner circle of the blue ring. This will help stick the blue and the top two red and white layers together.
6. Frost the middle of the two small red and white layers; being careful to pay attention to the way you've already stacked/frosted the bottom two red/white layers, place the small red/white layers into the center of the blue ring.
7. Frost the outside of the cake. (You may want to use a crumb coat first, to keep your frosting white and crumb free).
Ta-da!

Wow! Award winning!Isn't it fun trying something and it's a success?
ReplyDeleteBravo~
Oh Sweet Jayme Duke! Your talent supersedes mine if you can get a cake to cut and look like that! How fun and festive!
ReplyDeleteGorgeous. Simply GORGEOUS!
ReplyDeleteI will be making this cake for 4th of July this year. Period. :-)
This is such a fun, gorgeous cake! It definitely has a big WOW factor! I'm going to try it! Beautiful photos too:)
ReplyDeleteThank you so much for the pictures of the layers. I was having a hard time wrapping my head around the instructions. I'm a visual person, so this was perfect. I'm making this for my sister-in-law's birthday, which is on July 4th. Perfect! Thanks for the instructions and recipes.
ReplyDeleteSee a video of 17 and baking making this cake here: http://go2.wordpress.com/?id=725X1342&site=17andbaking.wordpress.com&url=http%3A%2F%2Fwww.king5.com%2Fnew-day-northwest%2FGet-Patriotic-with-17-and-Baking--97089114.html&sref=http%3A%2F%2F17andbaking.com%2Ffeatured-on%2F
ReplyDeleteThis is unbelievable!!! I love it! I'll be trying my hand at this one like everyone else. Thanks so much for the photos they are such a HUGE help...I'm going to make this for my son for his birthday and my neighbor for his July 4th party. I hope I can git er done!
ReplyDelete