The July Daring Bakers' challenge was hosted by Nicole at Sweet Tooth. She chose Chocolate Covered Marshmallow Cookies and Milan Cookies from pastry chef Gale Gand of the Food Network.
This month our challenge was two different type of cookies - mallows and milanos. I'm not much of a fan of either (and actually quite detested mallow type cookies when I was younger) so I chose to only make one of the two.
I recall as a child, occasionally scavenging the refrigerator for a snack and once in a while, my stepdad would have a package of Pinwheel cookies stashed in our fridge. Pinwheels are pretty much the same as mallows - marshmallows atop a cookie base, covered in chocolate (if I'm wrong, clue me in!). Every time I saw the bag, I desperately wished I liked them, because it always seemed they were around when I wanted a sweet snack, yet we had none. Sometimes I would take one and think "maybe this time I'll like it." Nope. It was the marshmallow that I didn't like, yet I didn't really have anything against them, per se - long as they were roasted and nestled between some melted chocolate and a couple of graham crackers. I recall one time out of desperation, attempting to eat the chocolate coating off of the marshmallow; it was a lot of work for so little chocolate (and still getting too much marshmallow!). I believe after that futile attempt, I finally gave up on the ol Pinwheels for good.
For some reason, despite my childhood recollections of this type of cookie, I chose the Mallows because I've been wanting to make homemade marshmallows for some time now and this seemed like a good opportunity. I also figured that, as with most foods as I've grown older, I might actually like this type of cookie now. I wouldn't know unless I tried, right?
So, without further adieu, I'd like to take you on a little photographic journey through the makings of a Mallow cookie...
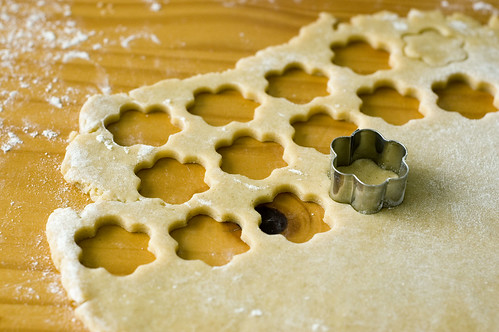
cutting the cookie base

isn't that pretty?
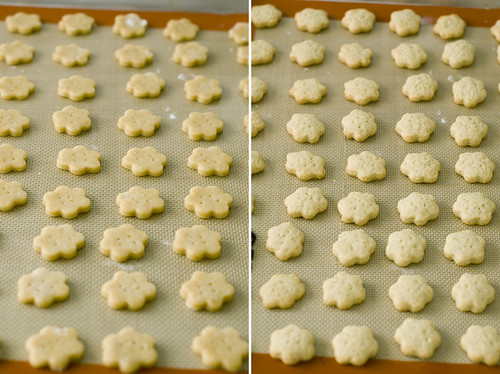
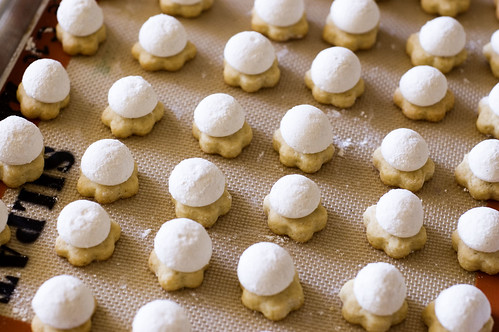
cookies pre and post bake, not much difference there
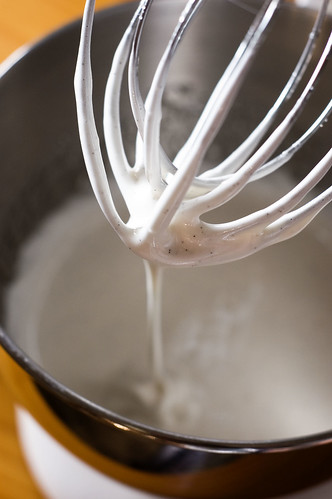
freshly whipped marshmallow - I see vanilla bean!
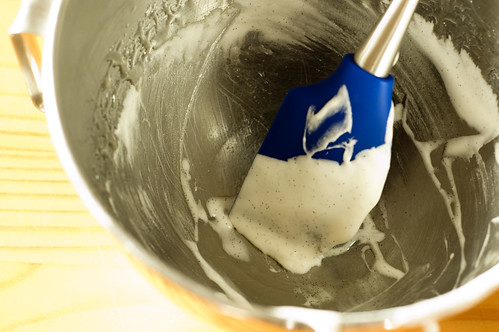
it's a messy job but somebody's gotta do it!
For some reason my marshmallow took a while to set up. The instructions say to pipe a "kiss" of marshmallow on your cookie base and when I tried that, my marshmallow just kind of oozed all over the side unless I used a small amount. So I tried this for a few, but I wanted a better shaped marshmallow.
piped marshmallow...need moar!
Luckily, another smarty pants Daring Baker showed us how you can use flour (or cornstarch) to mold your marshmallows into just about any shape you want. Just fill a shallow dish with flour (or cornstarch) and use whatever you wish to make an impression into the flour. You can then pipe your marshmallow into the mold and after a couple of hours, you have a perfectly shaped marshmallow to work with. You can dust off the excess flour (most store bought marshmallows have a light dusting of cornstarch to take away their natural stickiness) and re-use the flour you used to make your molds with.
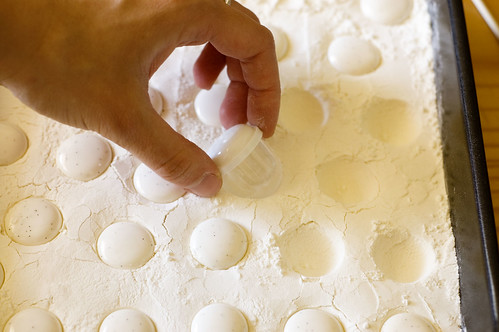
forming the molds

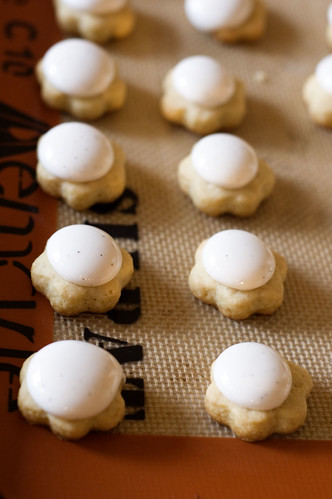
marshmallow piped into the molds - look at those luscious flecks of vanilla bean!
When I removed my marshmallows from their molds, I made sure not to get any flour on top of the marshmallow so that it would stick to the cookie base. This worked out very well and I didn't need to use any sort of extra adhesive to keep them together.
waiting to be dipped in chocolate
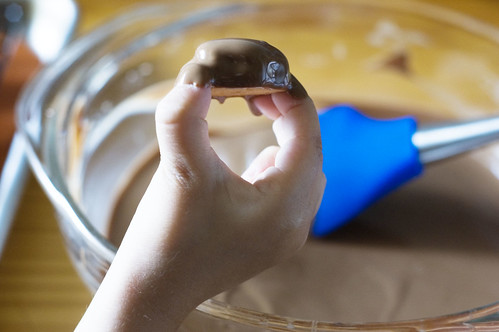
I got my little helper to give me a hand dipping
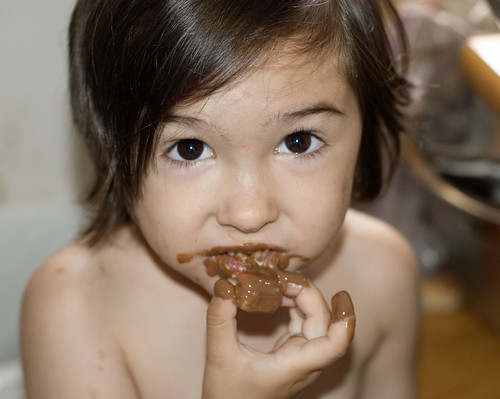
it's always good to taste your work!

He likes it! We have approval :)
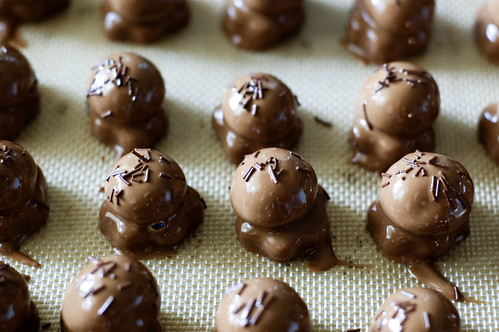
At first I was only dipping the tops and leaving most of the cookie base exposed, but after realizing I would have way too much left over chocolate I started dipping the entire cookie. I think they turned out looking better that way.

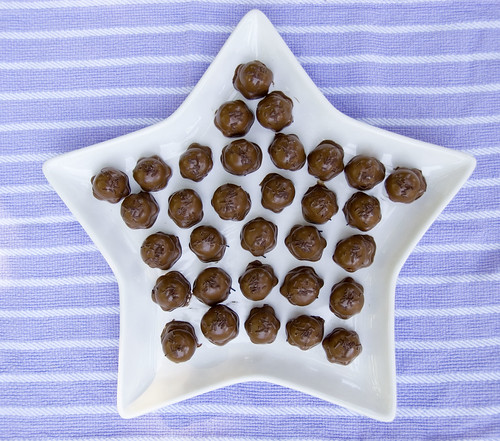
freshly dipped and waiting to dry
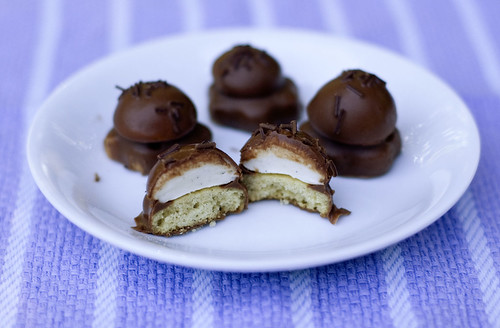
Well, as it turns out, no, I still don't like this type of cookie. I think they're just okay, and possibly could be better, but frankly, I don't have the desire to try these again. Once was enough for me. I found the cookie base to be lacking in depth of flavor. I also wasn't pleased with the visual result of the final product. If I had to do it again, I could definitely make them better. Don't get me wrong - it was a fun process - not very challenging, but it did involve a lot of steps. To be honest, my favorite part about this challenge was taking the photos. Also, I think it was good for me to try and make something that personally doesn't tickle my tastebuds, yet still try to do my best and have a good time in the process. In that aspect, I think this challenge was a success.
Mallows(Chocolate Covered Marshmallow Cookies)
Recipe courtesy Gale Gand, from Food Network website
Prep Time: 10 min
Inactive Prep Time: 5 min
Cook Time: 10 min
Serves: about 2 dozen cookies
3 cups all purpose flour
1/2 cup sugar
1/2 teaspoon salt
3/4 teaspoon baking powder
3/8 teaspoon baking soda
1/2 teaspoon ground cinnamon
12 tablespoons unsalted butter
3 eggs, whisked together
Homemade marshmallows, recipe follows
Chocolate glaze, recipe follows
1. In a mixer with the paddle attachment, blend the dry ingredients.
2. On low speed, add the butter and mix until sandy.
3. Add the eggs and mix until combine.
4. Form the dough into a disk, wrap with clingfilm or parchment and refrigerate at least 1 hour and up to 3 days.
5. When ready to bake, grease a cookie sheet or line it with parchment paper or a silicon mat.
6. Preheat the oven to 375 degrees F.
7. Roll out the dough to 1/8-inch thickness, on a lightly floured surface. Use a 1 to 1 1/2 inches cookie cutter to cut out small rounds of dough.
8. Transfer to the prepared pan and bake for 10 minutes or until light golden brown. Let cool to room temperature.
9. Pipe a “kiss” of marshmallow onto each cookie. Let set at room temperature for 2 hours.
10. Line a cookie sheet with parchment or silicon mat.
11. One at a time, gently drop the marshmallow-topped cookies into the hot chocolate glaze.
12. Lift out with a fork and let excess chocolate drip back into the bowl.
13. Place on the prepared pan and let set at room temperature until the coating is firm, about 1 to 2 hours.
Homemade marshmallows:
1/4 cup water
1/4 cup light corn syrup
3/4 cup sugar
1 tablespoon powdered gelatin
2 tablespoons cold water
2 egg whites, room temperature
1/4 teaspoon pure vanilla extract
(I also added the insides of 1 vanilla bean)
1. In a saucepan, combine the water, corn syrup, and sugar, bring to a boil until “soft-ball” stage, or 235 degrees on a candy thermometer.
2. Sprinkle the gelatin over the cold water and let dissolve.
3. Remove the syrup from the heat, add the gelatin, and mix.
4. Whip the whites until soft peaks form and pour the syrup into the whites.
5. Add the vanilla and vanilla bean and continue whipping until stiff.
6. Transfer to a pastry bag.
Chocolate glaze:
12 ounces semisweet chocolate
2 ounces cocoa butter or vegetable oil
1. Melt the 2 ingredients together in the top of a double boiler or a bowl set over barely simmering water.
I'm sorry you didn't love them! They're absolutely adorable, and I love how regular and uniform you are every step of the way! It makes for gorgeous photos :)
ReplyDeleteSweet little taste tester you have there!
Wow
ReplyDeleteYour mallows looks amazing!
They do look amazing!! I just can't get my head around the mold? Why don't I get it? Do you dip your mold in the cornstarch?Is that your mold the little clear and white opaque gadget?:)
ReplyDeleteAnd I particularly thing the cutie pie is the cutest little marshmallow helper:)
Love your pics! What an adorable little helper.
ReplyDeleteYour Mallows are perfect little bites of beauty! Love the cookie shapes, perfect marshmallow, your awesome step by step photos, and your little chocolate finger/face kidlet :)
ReplyDeleteYour marshmallows are adorable! I hope you licked that leftover marshmallow from the spatula...that photo is looking pretty tempting.
ReplyDeleteSo cute! I love the snaps of your little one with all of the chocolate!
ReplyDeleteThanks everyone :)
ReplyDeleteMonique, as for the molding goes, yes, you press whatever you're using into the cornstarch/flour which will hold the impression. :)
I love all the step-by-step pictures and the cute cookie shape and the final Mallow is perfect! Great job!!
ReplyDeleteWell I think your mallows look good enough for a top class cafe or restaurant they are simply perfect and the shape of the cookie base matches the marshmallow so well. And good to hear that the flour mould technique worked so well for you. Bravo - and love the pixs of your taste tester so cute. And great to hear you at least enjoyed the process if not the final product. Yours Audax (the smarty pants LOL LOL) from Australia
ReplyDeleteI think you did a wonderful job with these, even if they aren't a favorite. So clever to dip the gumball container in for your mold. Wonder if a Hershey's kiss would make a good mold.... it would give you the pointy top.
ReplyDeleteWonderful photos too! You've made me want to try my hand at marshmallow molding!
~Michelle
I get it now!!:)
ReplyDelete@Audax - haha yes you are quite the smarty pants! I feel honored to have you stop by my blog - I'm always in awe of how quickly you complete each challenge and the multiple times you make them! And you always have such helpful advice for everyone, that's awesome. thank you :)
ReplyDelete@Michelle - I love that idea! At first I wanted a domed top, but the more I saw the 'kiss' shaped ones, I wished I'd been able to get mine that way. You should definitely give marshmallow making a try, it's really easy. Messy, but easy :)
I LOVE your mallows, they're so adorable!
ReplyDeleteyour mallows look so cute!
ReplyDeletelovely pictures ^^ ... XOXO
ReplyDeletegine
www.dolcifelici.de/blog
Hi! greetings from Melbourne
ReplyDeleteThanks for ur marshmallow recipe, will try it soon for my macaron bakes, my cousin told me to try mallows in my macarons. Sounds strange? but it might be pretty cool...love the pic where the little kid has chos all over her mouth!!!so cute.
E
oh sorry i meant "little kid has chocs..." sorry i just wake up! what a silly errrorr
ReplyDelete